
Replacing trim around doors is an instant way to make your home look more expensive and really make an impact on your space. But do you really want to do all that demo? With this no demo trim update you’ll not only save yourself some demo time, but also money! Who doesn’t love an expensive look for less. This door casing update will leave you with a new trim look with less work and less spending.
Have you ever paid attention to trim in older homes? It’s wide, ornate and impactful. But houses today – especially my boring builder grade 2002 home- are build with thin, flimsy looking door trim and baseboards. In my opinion, it makes this space look cheap and adds no visual interest.
While installing trim work like the photos below would look silly in my 2000’s home, I use this as my inspiration to bring in more character and expensive looking charm.


Supplies You’ll Need
- Measuring tape
- 1×2 primed pine boards (in length of your door casings)
- Miter saw or manual miter box
- Nail & hammer or brad nailer
- Paintable caulk
- Wood filler
- 220 sand paper
- Paint
- Clamp (optional, but helpful if working alone)
- Nail set
Oak and Grain Refinishing is a reader-supported blog. At no extra cost to you, I may receive commission if you click and buy through links on this site. Please review Terms & Conditions.
Before door frame update…

There is a photo of the door trim before my clever no demo door trim update. See how flimsy the trim and baseboards look? In my version, I did end up removing the baseboards and replacing them with 1×4 primed pine boards. This allowed for a nice reveal when I added the 1x2s around the existing door casing. However, if you don’t wish to remove your baseboards you could simply use a saw attachment on an oscillating multi-tool to cut away the trim to accommodate for the 1×2 addition.
I opted for new, thicker baseboards because I was planning to do a board and batten design on the walls. I wanted the stiles to sit flush with my baseboards. If I kept the walls plain I would have probably left the original baseboards. To keep with the thicker trim theme check out my NO DEMO Taller Baseboard Hack post.
1) Measure & Make Your Cuts
After gathering your supplies and select the straightest 1×2 boards you can find, it’s time to measure and cut your updated door trim. Measure each side and top of the door frame. Remember, your house isn’t perfect so it’s worth measuring every door separately, because they may be different heights.
You could get away with just butting 90 degree angles up against each other to make a corner, but I wanted the seams from my new trim to match the 45 degree miter cuts on the previous trim.

Make your mark and cut at a 45 degree angle on a miter saw. I find it easier to mark my short end and draw myself a guideline. Making a “short end” note on the board helps me remember which direction to make my cut. If you don’t have a miter saw, a miter box like this would be a great budget friendly alternative.

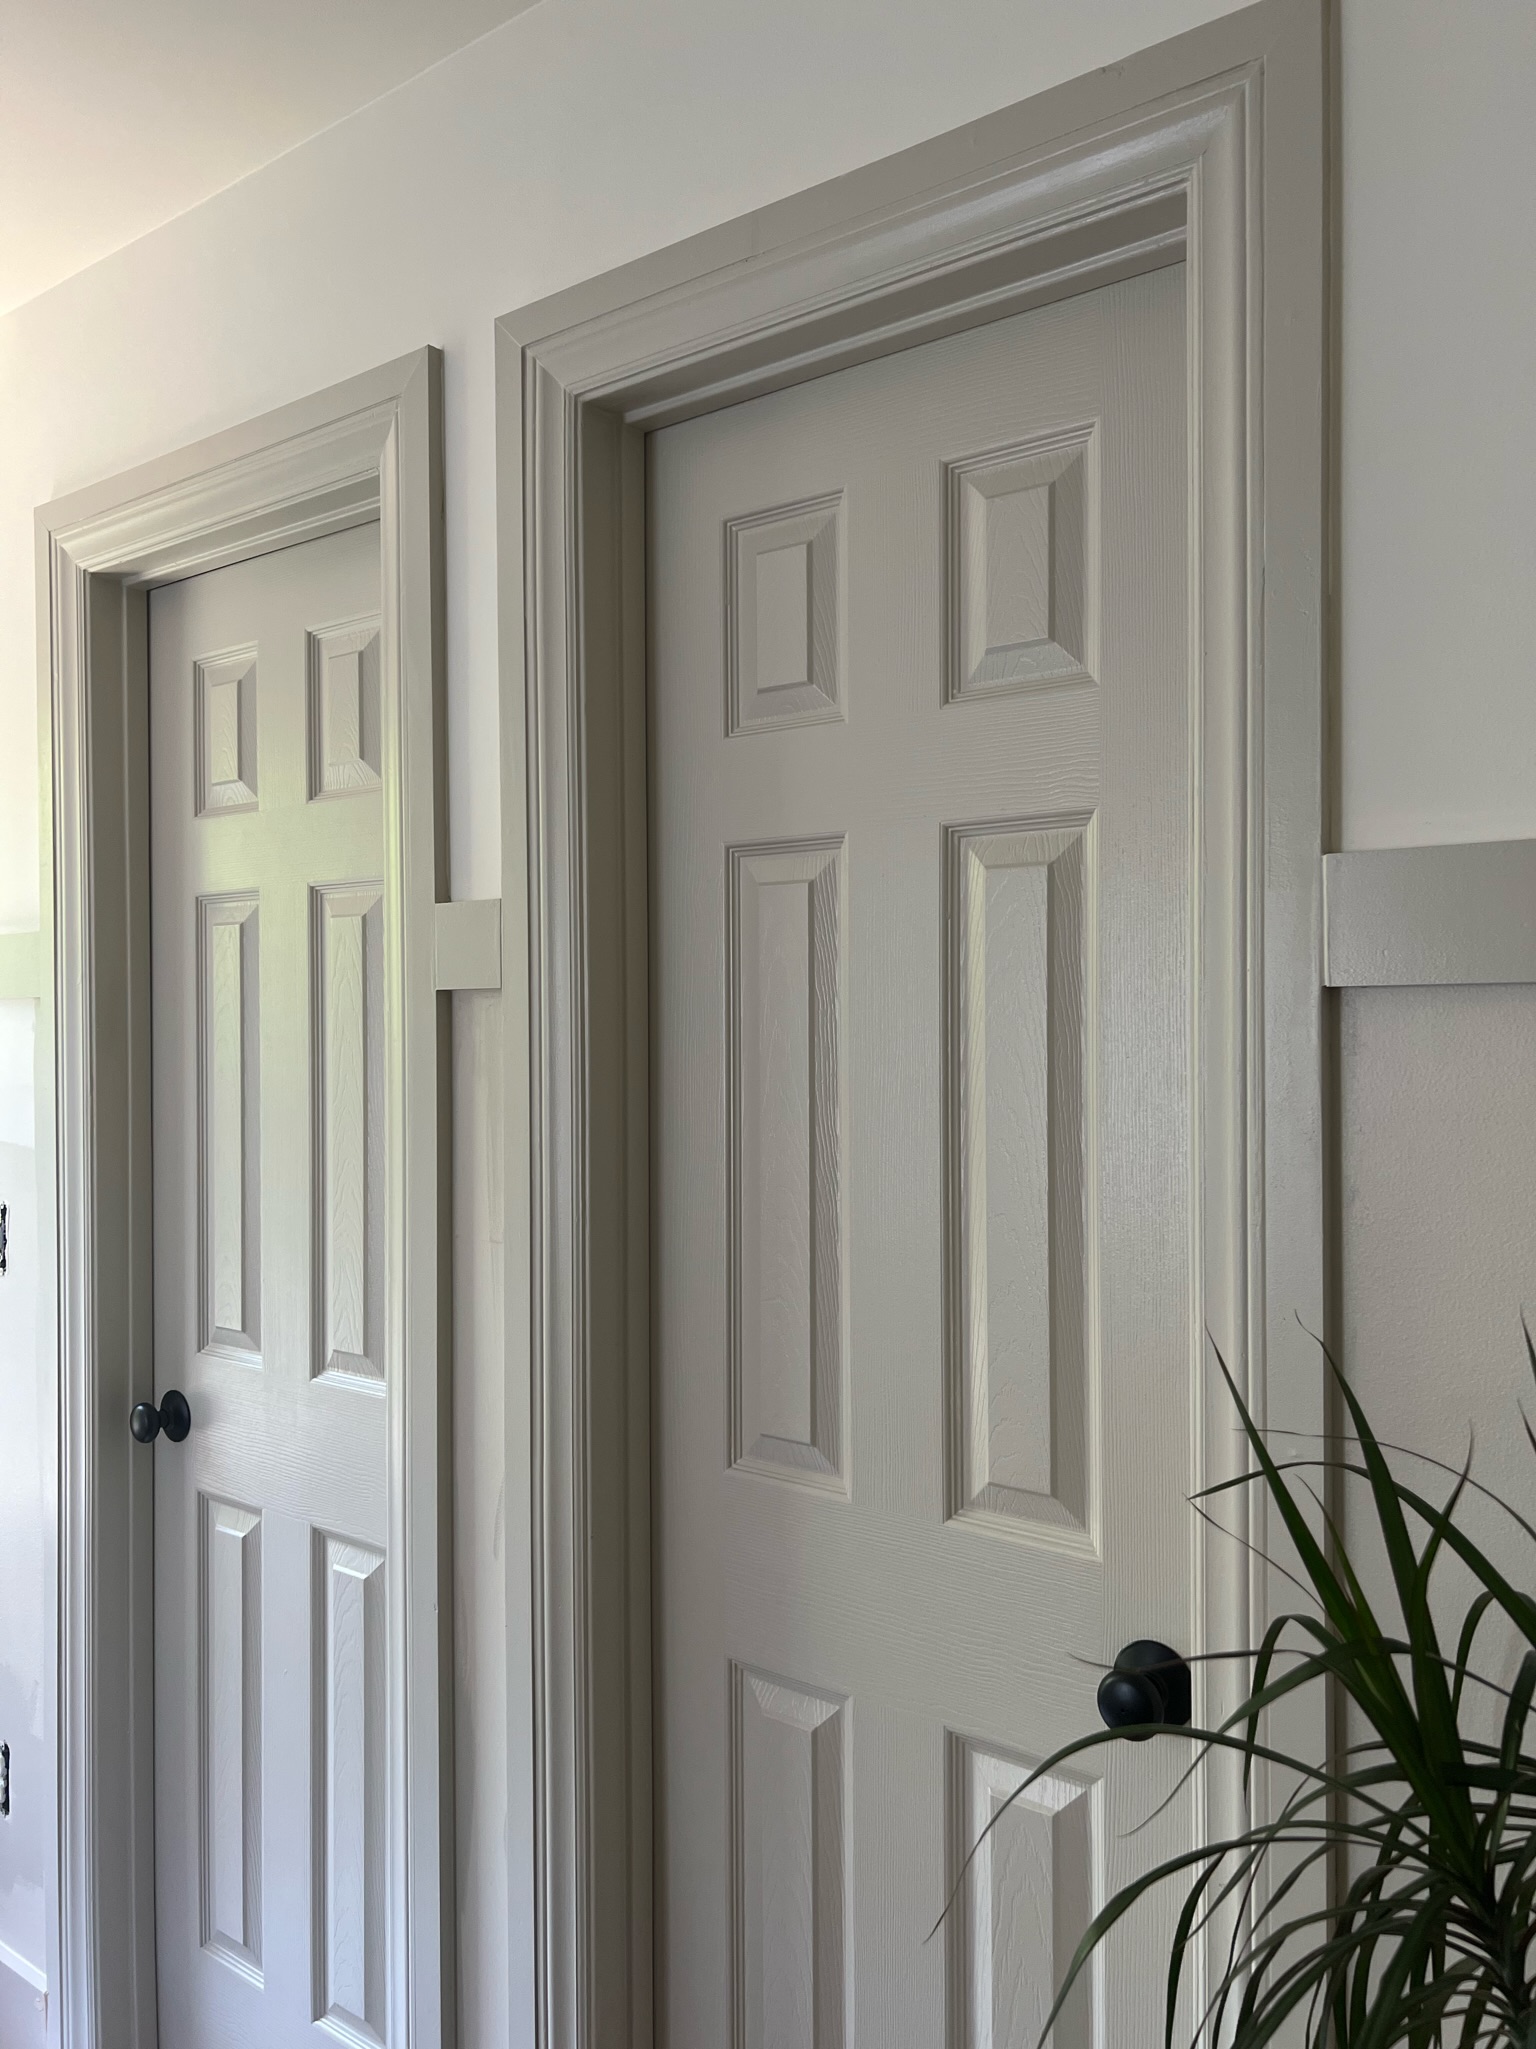
Below is a great example of the difference even a few inches can make. And this even before painting! Depending on the spacing of your doors between each other or adjacent walls, you could even go thicker!

2) Nail 1×2 boards around existing trim

After you have all your 1x2s measured and cut, it’s time to nail them around the original door trim. Using a brad nailer or an old fashion hammer and nail, nail the new trim around the existing trim. Want to hear my secret of how to nail door trim without glue? I point my nails in slightly different angles. This will result in a more secure attachment as opposed to all perfect right angle nails. I spaced the nails about every 12 inches. Don’t go too crazy because remember, you’ll have to fill all these holes later.
3) Set in your nails
Using the nail set, tap in any exposed nail heads sinking them slightly below the surface. We don’t want any nails showing through our paint job

4) Fill the cracks and holes
Take a little wood putty on your finger and fill all the nail holes you’ve created over your new, updated door trim. For the creases between the old trim and the 1x2s, use paintable caulk to create a smooth, seamless finish. Pro tip: use a baby wipe to wipe off excess caulk. It works like a dream.
5) Sand wood filler smooth
After the wood filler is dry, lightly sand the areas with 220 grit paper until you have a smooth surface.
6) Paint
Anyone else drooling over contrasting trim these days? I love how the updated door trim really pops now with the thicker casings and contrasting color. I selected the color Sculptor Clay by Behr. The upper walls are painted in Swiss Coffee, also by Behr.

There you have it, my no demo door trim update! It’s not only more budget friendly and more sustainable than all new trim, but also requires way less work. I think it creates an illusion of taller ceilings and wider doors, similar to how hanging drapes high and wide makes a room feel bigger. (I talk more about this in my 5 Budget Friendly Ways to Make Your Home Look More Expensive post).

Would you try this in your home? You could get even more creative with different trim styles or think outside the box with the addition of plinth boxes or rosettes (which may have to make an appearance here sooner or later). I hope you never look at trim the same!
Interested in more contrasting trim ideas? Mindy Jackson has a great article on choosing colors for contrasting trim if you’re interested click the linked source below.


Girl Behind the Blog

I’m Jess, the creator of Oak & Grain. A mid-west girl at heart who now resides in Raleigh, NC. I love finding old things and giving them new purpose by way of refinishing or incorporating unexpected, overlooked thrift store finds in the modern home. I work full-time in medicine and I love dipping into my creative side and in the process, keeping my sanity. Follow me on Instagram and YouTube to see more behind the scenes action.
4 responses to “Easy Trim Update for a Bigger Impact”
[…] No Demo Door Trim Update Primary Closet Makeover Board & Batten Tutorial (coming soon…) Refresh Wooden Furniture (coming soon…) […]
[…] you’ll probably love my minimal demo door casing update I also used in this hallway or the thicker trim hack I used in our primary bedroom. Both give the spaces a lot more character, but are so much easier to […]
[…] to Spray Paint Door Knobs No Demo Trim Update Gallery Wall Ideas Neutral Bedroom with Earthy […]
[…] Primary Bedroom Sources Easy Trim Update […]