
What is black wash finish?
Black washing furniture is a popular color washing technique that can give your old, worn-out furniture a new lease on life. It gives the perfect worn look without being chippy like milk paint. This technique involves applying a dark, thin coat of paint to your furniture, then wiping it away to create a distressed, vintage look that’s full of depth. I love this look because it looks like a black wood stain, but with only a fraction of the work! Black furniture is super popular right now, but this will get you a beautifully worn look.
But the best part…? Black washing furniture is fool proof!
I’m not exaggerating when I say this black wash paint finish technique is almost impossible to mess up. I’m half tempted to stop writing here and tell you to go try it without instructions, because I’m 98% confident it would turn out beautifully. You’re guaranteed to get a unique piece every time and never have to worry about brush strokes. (Hallelujah hands!) But because you’re here to learn a thing or two about how to black wash furniture before tackling your project and probably expect a little guidance, I will continue (but not because you need it).
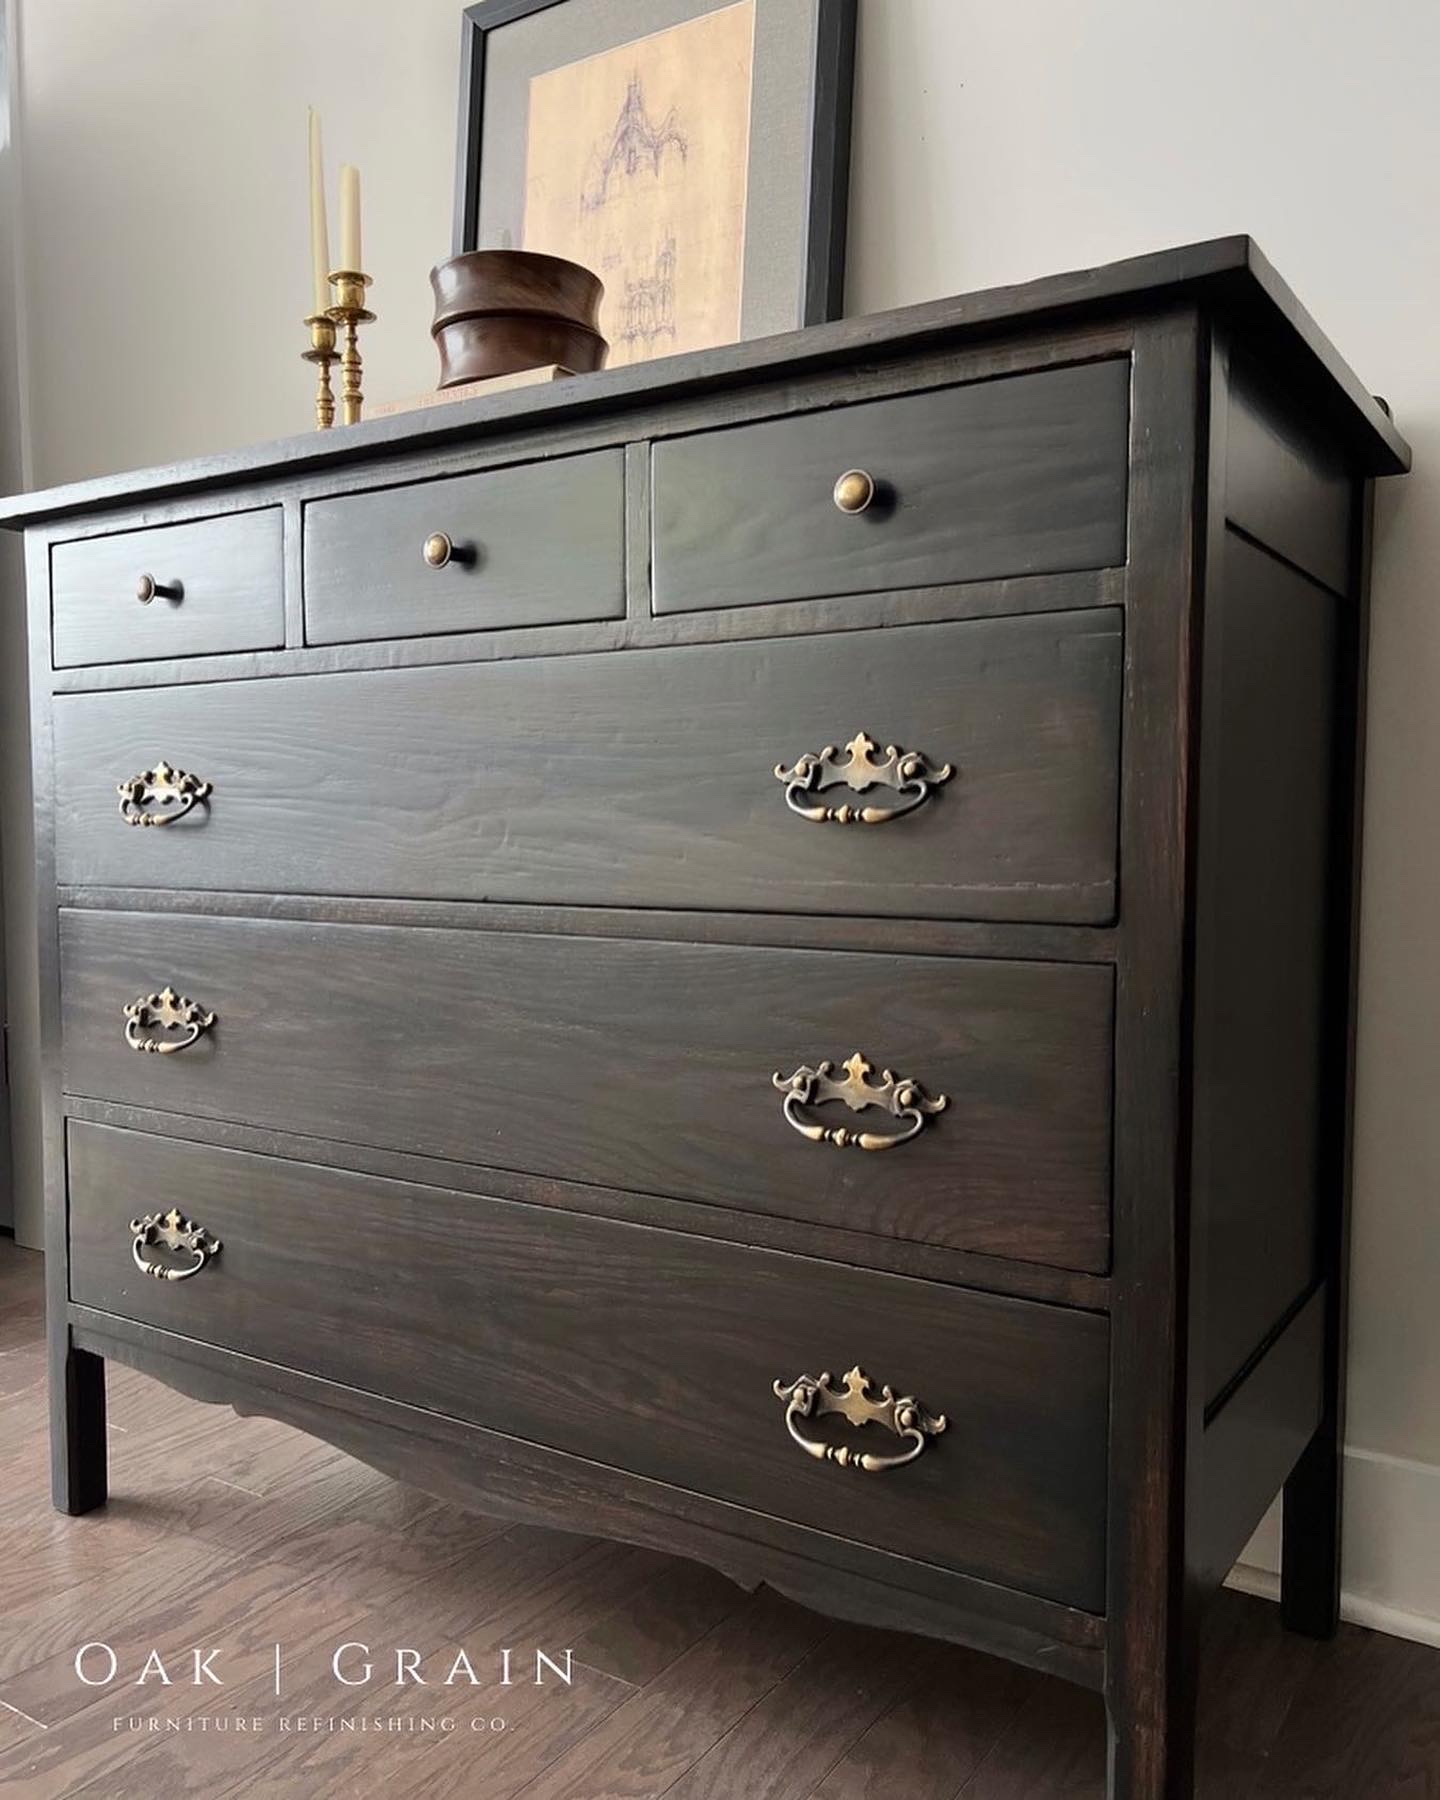
“This black washed chest of drawers may be the most forgiving project ever!”

It all started with this inspiration dresser from Burch Lane – the Ammerman 9 drawer for a whopping $1000. The more time I spend in thrift shops and estate sales the more prices from furniture retail stores just blow my mind! This one at least was partially real wood (the other parts being plywood and laminate). Meanwhile, I picked up this solid oak beauty from my local Habitat for Humanity for $80 and gathered my supplies to tackle a look-a-like project. You can do this on any real wood furniture.
To get the black washed looked you’ll need some basic tools:
- Degreasing product – KrudKutter, TSP or Dawn dish soap – any will do
- Sand paper or sanding sponges in 220 grit
- Clear primer
- Black Paint (Just has to be water based. I’ll be using WiseOwl Chalk Synthesis)
- Filtered Water
- Measuring cups
- High Quality paint brush – I used a 1.5” oval brush
- Lint free shop rags or other clean rag
- Mister Bottle
- Topcoat of your choice (poly, hemp oil or wax will work)
Oak and Grain Refinishing is a reader-supported blog. At no extra cost to you, I may receive commission if you click and buy through links on this site. Please review Terms & Conditions.
1. Clean the piece of furniture
Before you begin painting, you’ll need to clean and prep your furniture.
You never know where your furniture has been. So step one – ALWAYS – is clean your piece! First, remove any hardware and give the piece a good clean.
I love Krud Kutter and old T-shirts for this first, essential step. Dawn dish soap and water can also be a great degreaser. When I use Dawn I simply fill an old bowl with soapy water, dip an old T-shirt in the water, wring it out and wipe down the piece outdoors. When using Dawn or TSP I take the extra step of going over it a 2nd and 3rd time with water only to ensure there’s no residue remaining.
After the piece is squeaky clean and dry, it’s sanding time!
2. Scuff sand
The beauty of this finish is you get a very natural look – almost an espresso stained look – without sanding down to raw wood. (Can I get a hallelujah!) Using a 220 grit sand paper, all you need to do is scuff up the original finish. This may take a little more elbow grease if you have a super shiny previous finish. Clean away the dust with a microfiber cloth followed by a tack cloth before moving onto the next step.
3. Prime
In this project you’ll want to use a clear primer so the natural wood grain can still show through. Clear spray shellac and Wise Owl clear primer are both great options.
4. Paint & choose your removal style
This is where the fun begins! Let’s get into how to black wash furniture and how to make black wash paint.
WHAT KIND OF PAINT DO YOU USE FOR BLACK WASH?
Any water based paint will do! You can use chalk pain, latex or any mineral based paint for this black wash finish. I’d avoid enamel or fast drying paint.
Before I get too into it, I have a disclaimer: THERE IS NO WRONG WAY TO BLACK WASH FURNITURE! If you don’t like your first try, just take a damp rag and wipe off all the paint or re-brush and try again! It’s a beautiful thing, but also overwhelming so I’m going to point out at least 3 methods that I incorporated. You can mix them as you wish or need.
The Dab
Yes, like the dance move. Start by generously mist your surface, paint on full coverage paint, then take a dry shop rag and blot the areas you want to look worn. (no base coat is needed). If you want a heavier distressed look you can mist again or dampen your shop rag before blotting.
I like the control you have in this technique. If there are certain areas you want to look more worn this is a great way to achieve that. I recommend working in small sections for this approach so the paint doesn’t start to dry out before you’re doing dabbing.
Thin and Brush
If you don’t want the pressure of dabbing (I get it, not everyone is comfortable with their dance skills) and want a little less control you may prefer this approach. Thin down the paint with water at a 1:1 ratio and simply brush on the thinned paint. This will result in very thin, but buildable coverage.
For example, the pictures below were my first coat with this technique. The only challenge here is getting the paint thick enough not to drip on vertical surfaces, but thin enough to be somewhat translucent. Depending on the viscosity and coverage of the paint you may need to add more or less water. I like this technique for an even washed coverage across the entire piece that makes it almost look stained. Again, I recommend working in small areas.
Paint & Wipe
If you want both the control of the dab and the look of the thinned paint, this may be the favored method. For this technique you’ll still want to water down your paint, but 2:1 paint to water ratio. Brush on the thinned paint and wipe off the excess, applying firmer pressure over the areas you want to look more worn.
5. Topcoat
Once your whole piece of furniture is painted including drawer fronts, it’s time to move onto topcoating to protect your piece.
Pick your poison. For this project I used a “new to me” topcoat, Behr Water-Based Poly, because my local Home Depot was out of Varathane. When using a water based poly I typically reach for a satin finish – just personal preference. But feel free to reach for your favorite clear wax or hemp oil which would bring out the natural peak-a-boo wood grain nicely. Whatever you choose, it will be beautiful over your black washed furniture.
To finish off my piece, I cleaned up and attached the original hardware, leaving the patina to coordinate with the overall aged look. I absolutely love the final result!
In conclusion, black washing furniture is an easy and affordable way to transform your old furniture into a stylish, vintage statement piece. With a little bit of patience and some basic supplies, you can achieve a beautiful and unique look that will add character to any room.
I can’t wait for you to try this super simple technique that results in a very advanced looking finish with lots of depth. With so many techniques how to black wash furniture, all of which are very forgiving, this is a fantastic project for beginner furniture painters.
Happy paint washing!

Girl Behind the Blog

I’m Jess, the creator of Oak & Grain. A mid-west girl at heart who now resides in Raleigh, NC. I love finding old things and giving them new purpose by way of refinishing or incorporating unexpected, overlooked thrift store finds in the modern home. I work full-time in medicine and I love dipping into my creative side and in the process, keeping my sanity. Follow me on Instagram and YouTube to see more behind the scenes action.
2 responses to “How to Black Wash Furniture”
Love this! The dresser is beautiful!
Will this work on laminate cabinets? I would love to do this to my kitchen cabinets.
Thanks
Thanks, Donna! I haven’t personally tried this on laminate but I don’t see why it wouldn’t work! I’d still give it a gentle scuff sand before painting & try the inside of a cabinet first. But I’d love to hear if you end up trying it!