
Looking for an easy way to add character and texture to your bedroom? A wall treatment like board and batten may be just what you need! In this tutorial, I’ll take you along step-by-step in how to create a board and batten design, complete with new baseboards.
So many other tutorials oversimplified the process and left me with many unanswered questions. All of which we’ll dive into here!
Whether you’re a DIY beginner or an experienced pro, this wall treatment idea is sure to add interest to any room. So grab your calculator and tools and let’s get started!
Supplies You’ll Need:
- Measuring tape
- Crow bar
- Miter saw
- Jig saw (depending on if you have batten going around outlets)
- Table saw (or friend with a table saw 😉
- 1×3 primed boards (height of the stiles)
- 1×4 primed boards (enough for perimeter of room)
- 1×2 primed boards (enough for perimeter of room)
- 1×6 or 1×5 primed boars for baseboards (enough for perimeter of room)
- Level (laser level would be even better)
- Nail gun
- Glue (optional)
- Nail set
- Caulk
- Wood filler
- 220 grit sand paper or blocks
- Paint (I used color Sculptor Clay by Behr)
- Paint brush
- Paint roller and tray

Step by Step Board and Batten Tutorial
1) Remove old baseboards
For this step, gather your box cutter/ razor blade, rubber mallet and a few crow bars. Start by scoring the caulk where the upper edge of the trim meets the wall. You can then squeeze your crow bar in and inch along alternating between scoring the caulk and moving your crow bar down the wall.

2) Calculate board and batten design
Once your baseboard is removed, it’s now time to plan the board and batten wall treatment design. This, in my opinion, is the hardest part and so easy to overthink when deciding on your board and batten design. Some common Q&As:
How do you space board and batten?
12-17 inches depending on the wall.
What’s an appropriate height for the chair rail?
There are no rules! It depends on your space and what kind of furniture you’re working around. You could keep it chair rail height, extend it up to over half the wall or cover the entire wall. It’s up to you!
I knew I wanted a little board and batten peeking out over the head of my bed. So I took the height of my headboard + 6 inches to get the total height of about 63 inches.
What materials do you use for board and batten?
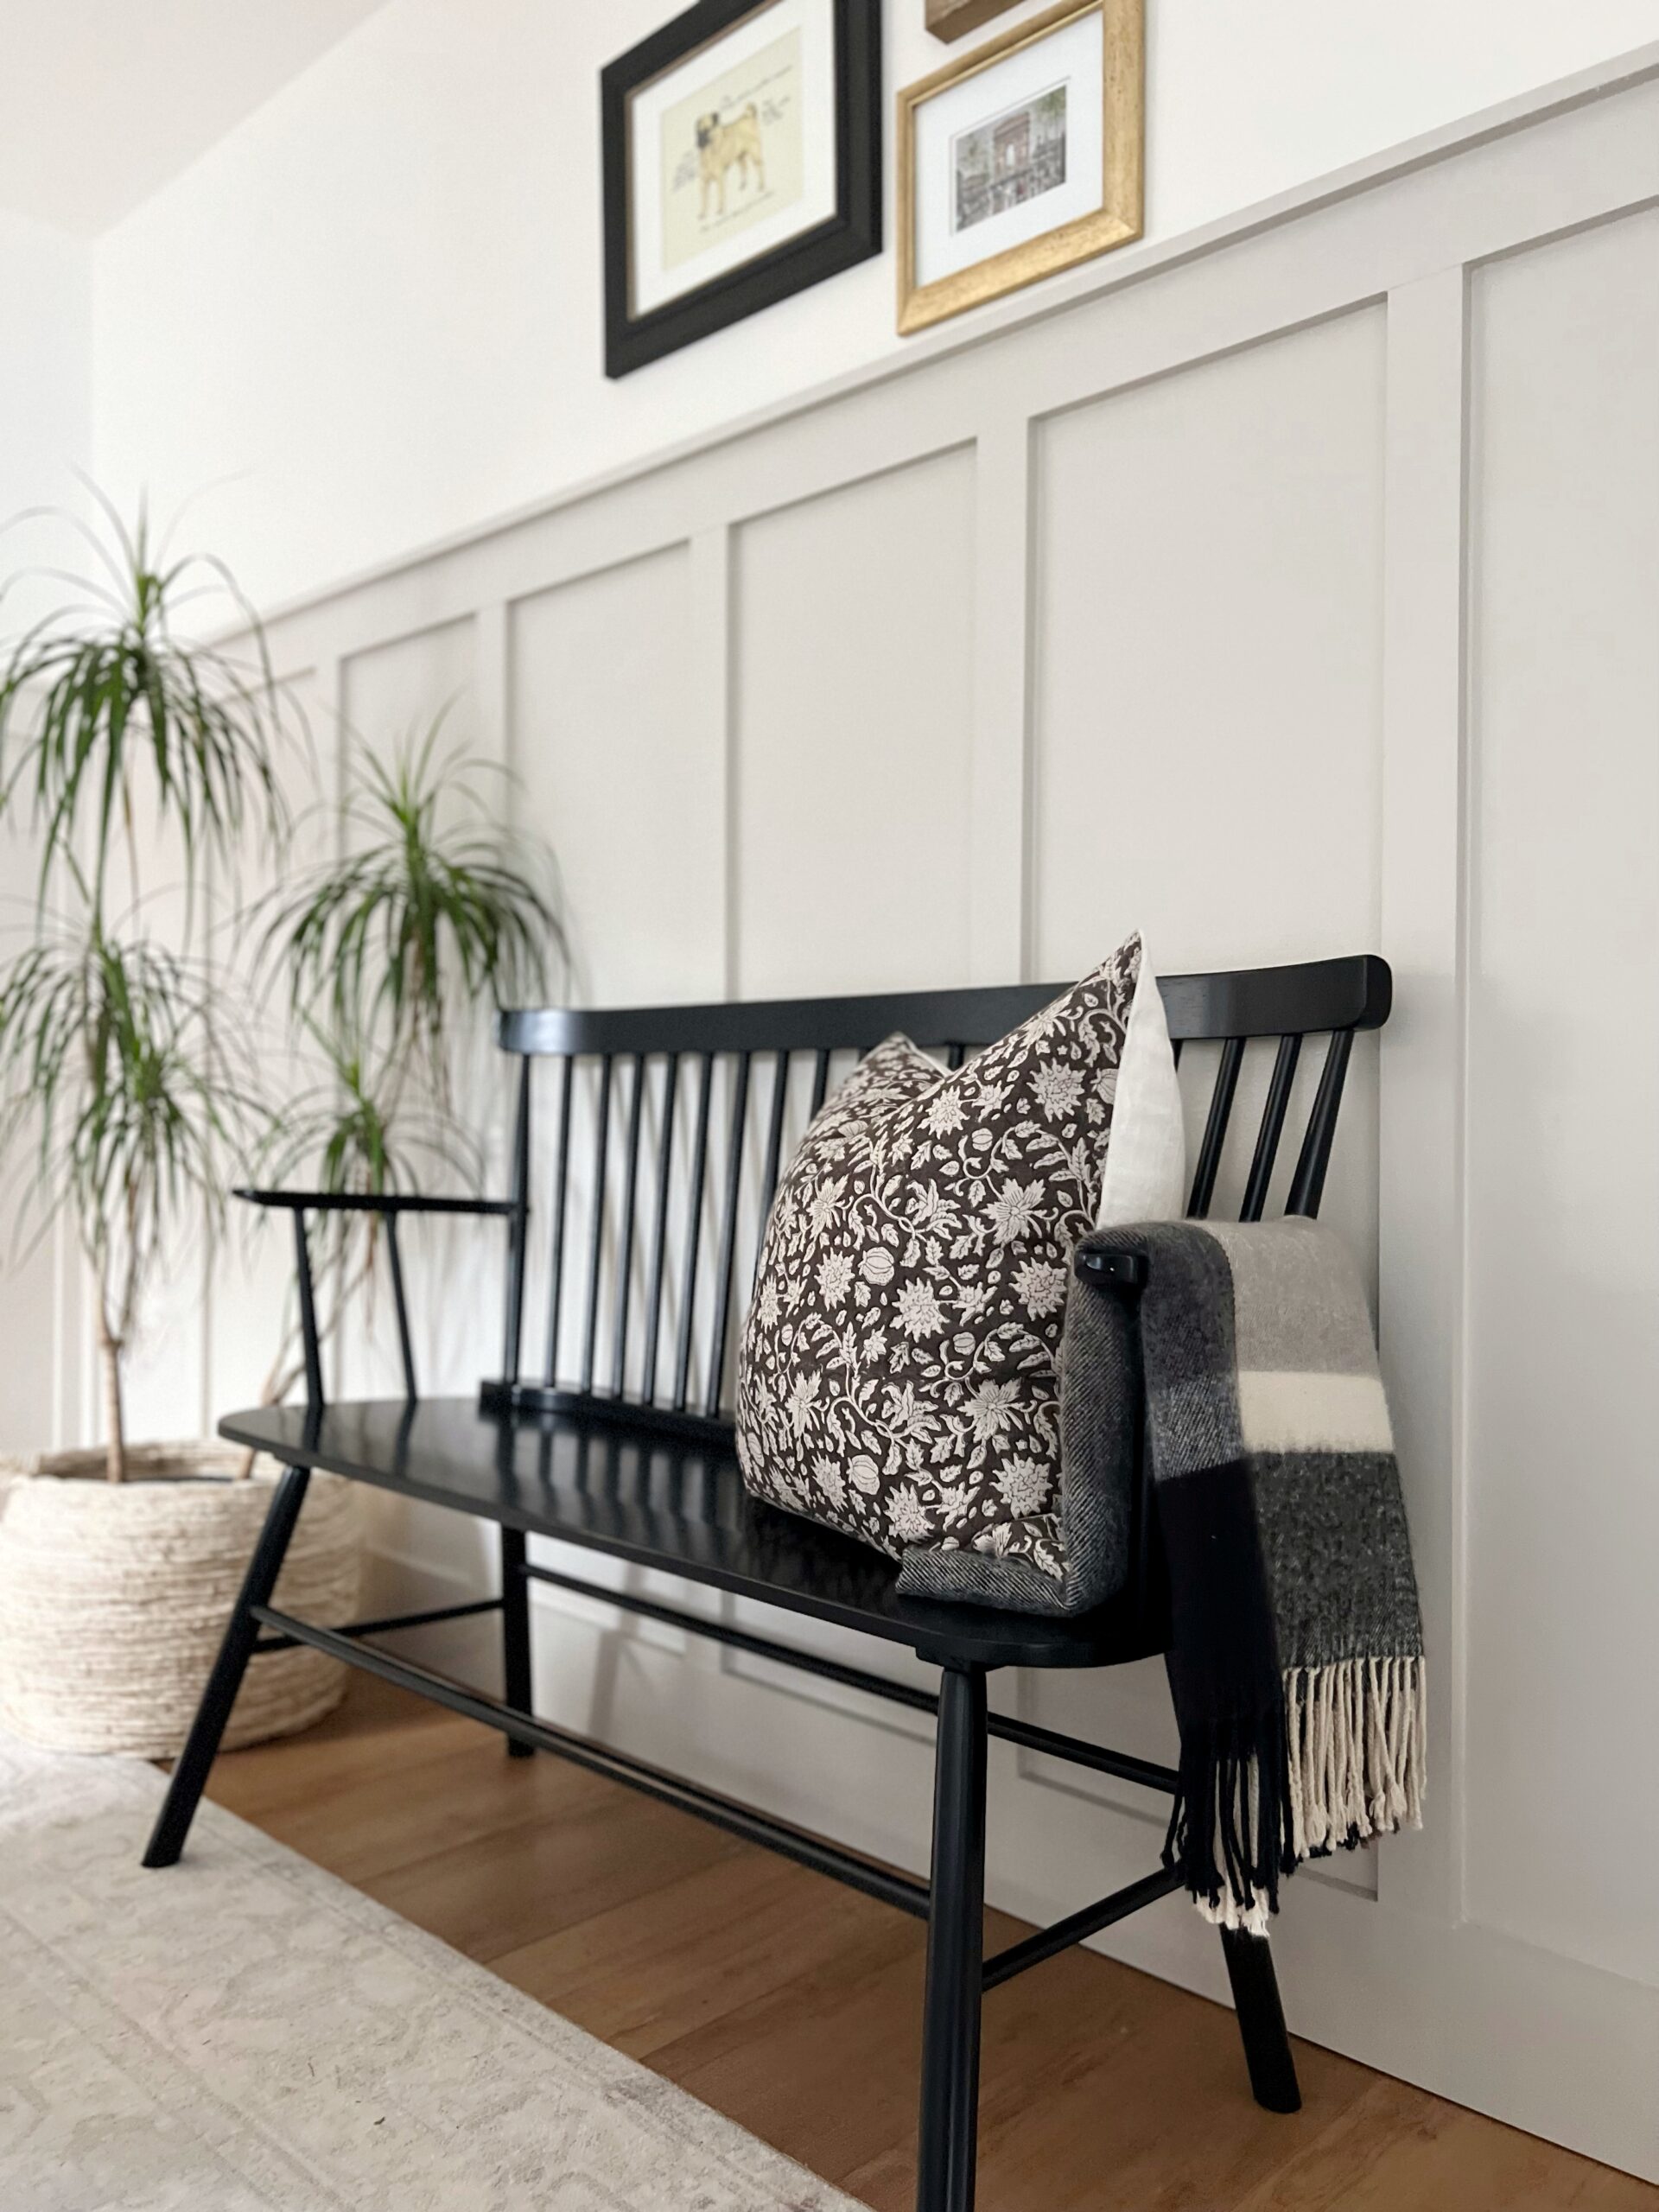
I used a variety of 1×2 – 1×5 oriented like the photo below. Primed finger-joint common boards did a fine job (just make sure you get the straightest ones the hardware store has).

Do you want corner pieces for the wall treatment?
I opted for a half a stile in each corner for a polished look. This decision complicates things a bit, but I’ll talk you through it.
I personally like the crisp look of a stile in each corner. However, if you want a little more wiggle room you can leave the corners bear.
Do you prefer equal board and batten spacing around the room or centering stiles around structures like doors and windows?
It was important to me for stiles to be centered around windows. In this case, I calculated these walls in 2 separate parts to determine the distance between stiles and number of stiles.
TAKE IT ONE WALL AT A TIME
It’s hard to tell after the fact, but each wall of the bedroom has different board and batten spacing. It ranges from 17 inches to 12 inches on each wall. But deciding the distance of stiles one wall at a time will keep it simple. I recommend starting with the wall that will be the focal point.
DRAW IT OUT
Drawing out your board and batten REALLY helps. Start by drawing in door frames and windows and measuring the total distance of the wall. Create a drawing for each wall which we’ll calculate separately next.
Placing piece of tape along the wall can also help give you a good visual of how you want to space your board and batten. I personally like a distance between 12-17 inches. Depending on your room size you may like something on a wider or more narrow scale.
SIMPLE WALL CALCULATIONS
This wainscoting layout calculator is fantastic tool for simple board and batten spacing calculations. It does all the work for you for walls without doors or windows assuming you’re placing a full stile in each corner.
The problem for me? I didn’t like the idea of a full stile in the corner. Instead, I wanted a half stile on each wall so the total corner stile L length was that of a full stile (or perhaps I just like making things difficult for myself). I also have doors and windows to complicate matters.
CENTERING DOORS OR WINDOWS
This is where things can get a little tricky. I was really picky about centering stiles underneath the windows. With this approach, I considered the space around the window as it’s own wall.

I measured the distance from the window to corner and marked that equal distance on the other side of the window. I took the total distance around the window subtracted by 1/2 a stile width on each side to determine my total distance around the centered window.
Math & Spacing for Wall A2
Wall a2 distance (centered around the window) – 1/2 stile width on each side = distance to calculate
distance to calculate – (number of stiles x width of stiles) = total width of panels
total width of panels / # of panels = panel Width for Wall A2
Now to determine Wall A1 panel widths…
Remainder of wall distance should be measured from the opposite wall corner to outer stile from Wall A2. Then subtract half the width of a stile, since you’ll be adding a 1/2 stile to the corner. This is your wall(b) length.
Math & Spacing for Wall A1
TOTAL DISTANCE FROM END STILE OF WALL A2 TO CORNER = WALL A1 DISTANCE
WALL A1 DISTANCE / (PANEL WIDTH FOR WALL A2 + stile width) = # OF PANELS FOR WALL A1 (ROUND DOWN TO NEAREST WHOLE NUMBER)
# of panels – 1 = # of stiles on wall A1
WALL A1 DISTANCE – ((1/2 stile width for corner stile) + (# of stiles x width of stiles)) / TOTAL # of panels FOR WALL A1 = panel Width of Wall A1
3) Install new baseboards
Using the 1×5 boards, install the pre-painted new baseboards using a brad nailer. I found it helpful to wedge my crow bar under the bottom as I went along to ensure I had equal spacing between the floor and baseboards consistently all the way around the room. A tiny space will allow expansion of the flooring with temperatures changes. (I didn’t end up installing a shoe mold or quarter round because I prefer the simple look. So far, I’ve had no issues with cleaning).
4) Measure & nail top rail
Using the 1×4 boards, find the heigh of your desired board and batten and attach to the wall around the perimeter of the room. Because rooms are often times not perfect right angled boxes, I recommend hanging the top rail of your board and batten first to ensure it’s level.
No need to use glue for this part – simply nail where studs are located for a secure attachment. At seams, I just butted the boards up together at right angles. We’ll fill & sand later.
Once the top rail was hung, I attached a 1×2 perpendicular to the 1×4 to create a shelf-like appearance.
5) Measure & cut stiles individually
Because most rooms aren’t perfect 90 degrees boxes and your walls are probably shorter on one side than another, I opted to first install the top railing to ensure it was level, then add in the stiles. Had we hung the stiles first the top rail would have been obviously wonky!
I measured each stile separately and you can see the measurements were annoyingly different for each one. One some walls there was almost a full inch difference!

HOW TO CUT CORNER STILES
For my corner stiles, I had my friend with a table saw help me to split the boards. I used 1×3 boards for my stiles (which actually means they are 2.5″ wide) so ideally I wanted 1.25 showing on each wall in the corners. However, to make my life a bit easier, I ended up putting a full stile on one wall and in the adjacent corner I used a board that was split to 1.75″ so it looks centered when butted up against each other. (keeping in mind the thickness of the boards is 0.75 inches)


6) Glue & nail stiles
Next, I attached the 1x3s to the wall in a repeating vertical fashion to create the stiles. I found it really helpful to create a little template spacer out of scrap wood when hanging the wall treatment. It eliminated having to measure spacing for board and batten between every single stile. If you are over a stud, no need for glue.
We used a level vertically to ensure each stile created 90 degree angles. This would be a great job for a laser level!
I’ve also found that if you angle your nail gun slightly differently with each nail instead of all 90 degree nails you can often get away without the glue (which might later ruin your walls if you ever take it down. TBD on that one).
ACCOMIDATING OUTLETS
If you’re lucky, you won’t run into any outlets with your design. However, if you do simply trace the outlet overlap on your board and grab your jigsaw. Once cut, you’ll want to sand the edges smooth with a 120 then 220 grit.

7) Caulk all seams
Caulking around board and batten before painting is an important step to ensure a professional-looking finish. Here are the steps to follow:
- Before applying the caulk, make sure the board and batten are clean and free of any debris or dust.
- Choose the right caulk: There are many options to choose from, just make sure it’s paintable.
- Apply the caulk: Load the caulk into a caulking gun and apply a thin, consistent bead of caulk along the seam between the board and batten.
- Smooth the caulk: Using a wet finger, damp paper towel or even baby wipe, smooth out the caulk and remove any access.
- Allow the caulk to dry: Follow the manufacturer’s instructions for drying time, some dry in as little as 20 minutes.


8) Set nails sticking out & fill with wood filler
Using a nail set and wood filler is a simple and effective way to cover up nail holes in woodwork. Here are the steps to follow:
- For this step you will need a nail set, wood filler, a putty knife and, sandpaper.
- Set any nails that are poking out: Use a nail set to countersink the nail below the surface of the wood. This will create a small depression for the wood filler to sit in.
- Apply wood filler: Use a putty knife (or your finger if you’re lazy like me) to apply wood filler to the depression, filling it completely.
- This is a great time to go over the butted edges of the top board and seams where the stiles meet the baseboards and top board.
- Once the filler is dry sand it smooth until it is flush with the boards.
9) Paint
Once the filler is nice and smooth and your caulk is dry – it’s time for paint! I chose the color Sculptor Clay by Behr to paint the entire board and batten design.

In conclusion, adding a board and batten to your bedroom is a simple and affordable way to give your space a fresh new look. I absolutely love the subtle and sophisticated texture that this treatment gives a room.
I’ve done my best to leave no stone unturned when it comes to how to hang board and batten, but if I left any questions unanswered please drop them down in the comments!
You may also like…
Girl Behind the Blog

I’m Jess, the creator of Oak & Grain. A mid-west girl at heart who now resides in Raleigh, NC. I love finding old things and giving them new purpose by way of refinishing or incorporating unexpected, overlooked thrift store finds in the modern home. I work full-time in medicine and I love dipping into my creative side and in the process, keeping my sanity. Follow me on Instagram and YouTube to see more behind the scenes action.
One response to “How to (Really) Hang Board & Batten with New Baseboards”
[…] How to Hang Board and Batten Post […]