
When it comes to enhancing the aesthetics of your home, paying attention to the details can make a huge difference. One often overlooked aspect is the door casings and trim around your door and window openings. Updating these elements can take your living spaces to the next level, making them look so much richer. Which brings me to this simple door casing update…
I grew up in a Craftsman style home built in the early 1900s so nothing bores me more than bland door trim. Older homes were built meticulously with such beautiful architectural detail that new homes lack. Anyone else crave that old home feel?
In this blog post, I’ll show you how I took the most basic of builder grade trim and gave it a more custom, craftsman style look on a major budget! This is an easy and relatively simple project that can be done in a weekend with minimal tools and supplies. This door casing update involves minimal demo and almost no wasted products! While there are many different types of casing styles, my goal was to create more architectural interest with a craftsman style look.
Oak and Grain Refinishing is a reader-supported blog. At no extra cost to you, I may receive commission if you click and buy through links on this site. Please review Terms & Conditions.

Replacing door trim can be an expensive and laborful task, esp with the details that come with a craftsman door style. But this simple door trim update I’ll show you how to reduce the work and material, not only making it more budget friendly but more time effective for a beautiful craftsman-style door frame.

Supples Needed for Door Casing Update:
- 1 x 6 pre-primed boards (distance of all your doors + windows)
- Cove molding (distance of all your doors + windows)
- 1 x 2 pre-primed boards (distance of all doors + windows x 2)
- Measuring tape
- Pen/Pencil
- Crow Bar
- Pliers
- Razor blade and/or putty knife
- Power miter saw
- Painters tape
- Oscillating tool
- Long straight edge (yard stick, level or scrap wood will do)
- Caulk and caulk gun
- Brad nailer
- Wood clamps
- Wood filler
- 220 sand paper or sanding sponges
- Trim paint (you’ll want this to match your existing trim)
- Nail set & hammer
Step 1: Mark Cut Lines
For the first step in this trim update I used a straight edge to mark a guideline at height of the doorframe opening. I’m only going to be removing the upper strip at a 90 degree angle. Where the original casing top corners were mitered edges, the new trim will be butted edges. I’m going for an older home look, and butted edge trim is very common in farmhouse or craftsman style homes you see. To keep cost and demolition to a minimum, I’ll be leaving the vertical trim lining the sides of the door in place. Sound crazy…? Just trust me. Even though the horizontal and vertical trim will be different sizes this door casing update is magic!

Step 2: Slice Along Caulk Lines
After straight horizontal lines are drawn, I’m using a utility knife to slice along the old caulk line where the trim meets the door jamb itself as well as the sides of the trim. This will help loosen up the trim for easy removal.

Step 3: Cut Top of Old Trim
Next, to fully remove the upper trim, I used my oscillating tool to cut a horizontal line where I previously drew my guideline. Take is slow so you don’t completely destroy your walls.

Once the upper trim is cut, I used a crow bar and rubber mallet to remove the upper casing from the wall. These are usually just held up by a few nails and caulk so it shouldn’t take much force as long as you effectively sliced through the caulk.


Step 4: Remove Nails
Now the head casing should look like the picture above. Next, it’s time to remove nails. I highly recommend using needle nose pliers to grip and remove in a rolling fashion – this takes the least amount of muscles.

Step 5: Measure Door & Window Widths
Using your measuring tape, measure the width of your window and door casing. You’ll want to measure from outer edge to outer edge. Measure all the windows and doors that you plan to refresh and jot them down on a notepad.

Step 6: Make Cuts to Create New Header
Time to grab all that trim you purchased from the hardware store. I personally purchased pre-primed finger boards which worked well. Any paint-grade wood casing will do, it doesn’t even have to be solid wood if you prefer to use MDF or composite. Cut the 1×6 the exact width of the door or window casings.

I then cut a 1×2 1 inch longer than the 1×6 for each header casing. So you’ll have a 1/2 inch overhang on each side of the 1×6.

Once your bottom 1×2 and 1×6 are cut it’s time to get a little fancier. Ok, but it’s still not that fancy. Head to your miter saw with the cove molding trim. Set the miter to a 45 degree angle and cut the cove molding the same length as the 1×6 (short end to short end).
Tip: I love to cut one end, then lay it up directly against the 1×6 and make an exact mark instead of trying to measure. I then made a small 45 cut for the piece that will wrap around the side of the 1×6.

It’s time to cut our last piece of trim – the part that will sit on top of the 1×6 and cove molding. To determine this length I first cut the cove molding and dry fitted the 1×2 on top. I then marked the exact length of the 1×2 with a pencil. Whenever I can skip the measuring step, I DO!
Door casing update / door casing makeover / door trim DIY / DIY craftsman trim
Step 7: Assemble New Header
I used Titebond, Bessey clamps from my friends over at Harbor Freight and my brad nailer with finishing nails to assemble everything together. See the reference photo below for a refresh on the new door casing layout.


Once the wood glue is dry, I then removed the clamps and filled in the nail holes with my favorite wood filler, Ace Wood Putty. After the wood putty was dry I sanded it smooth with 220 grit sand paper.
Step 8: Paint New Trim
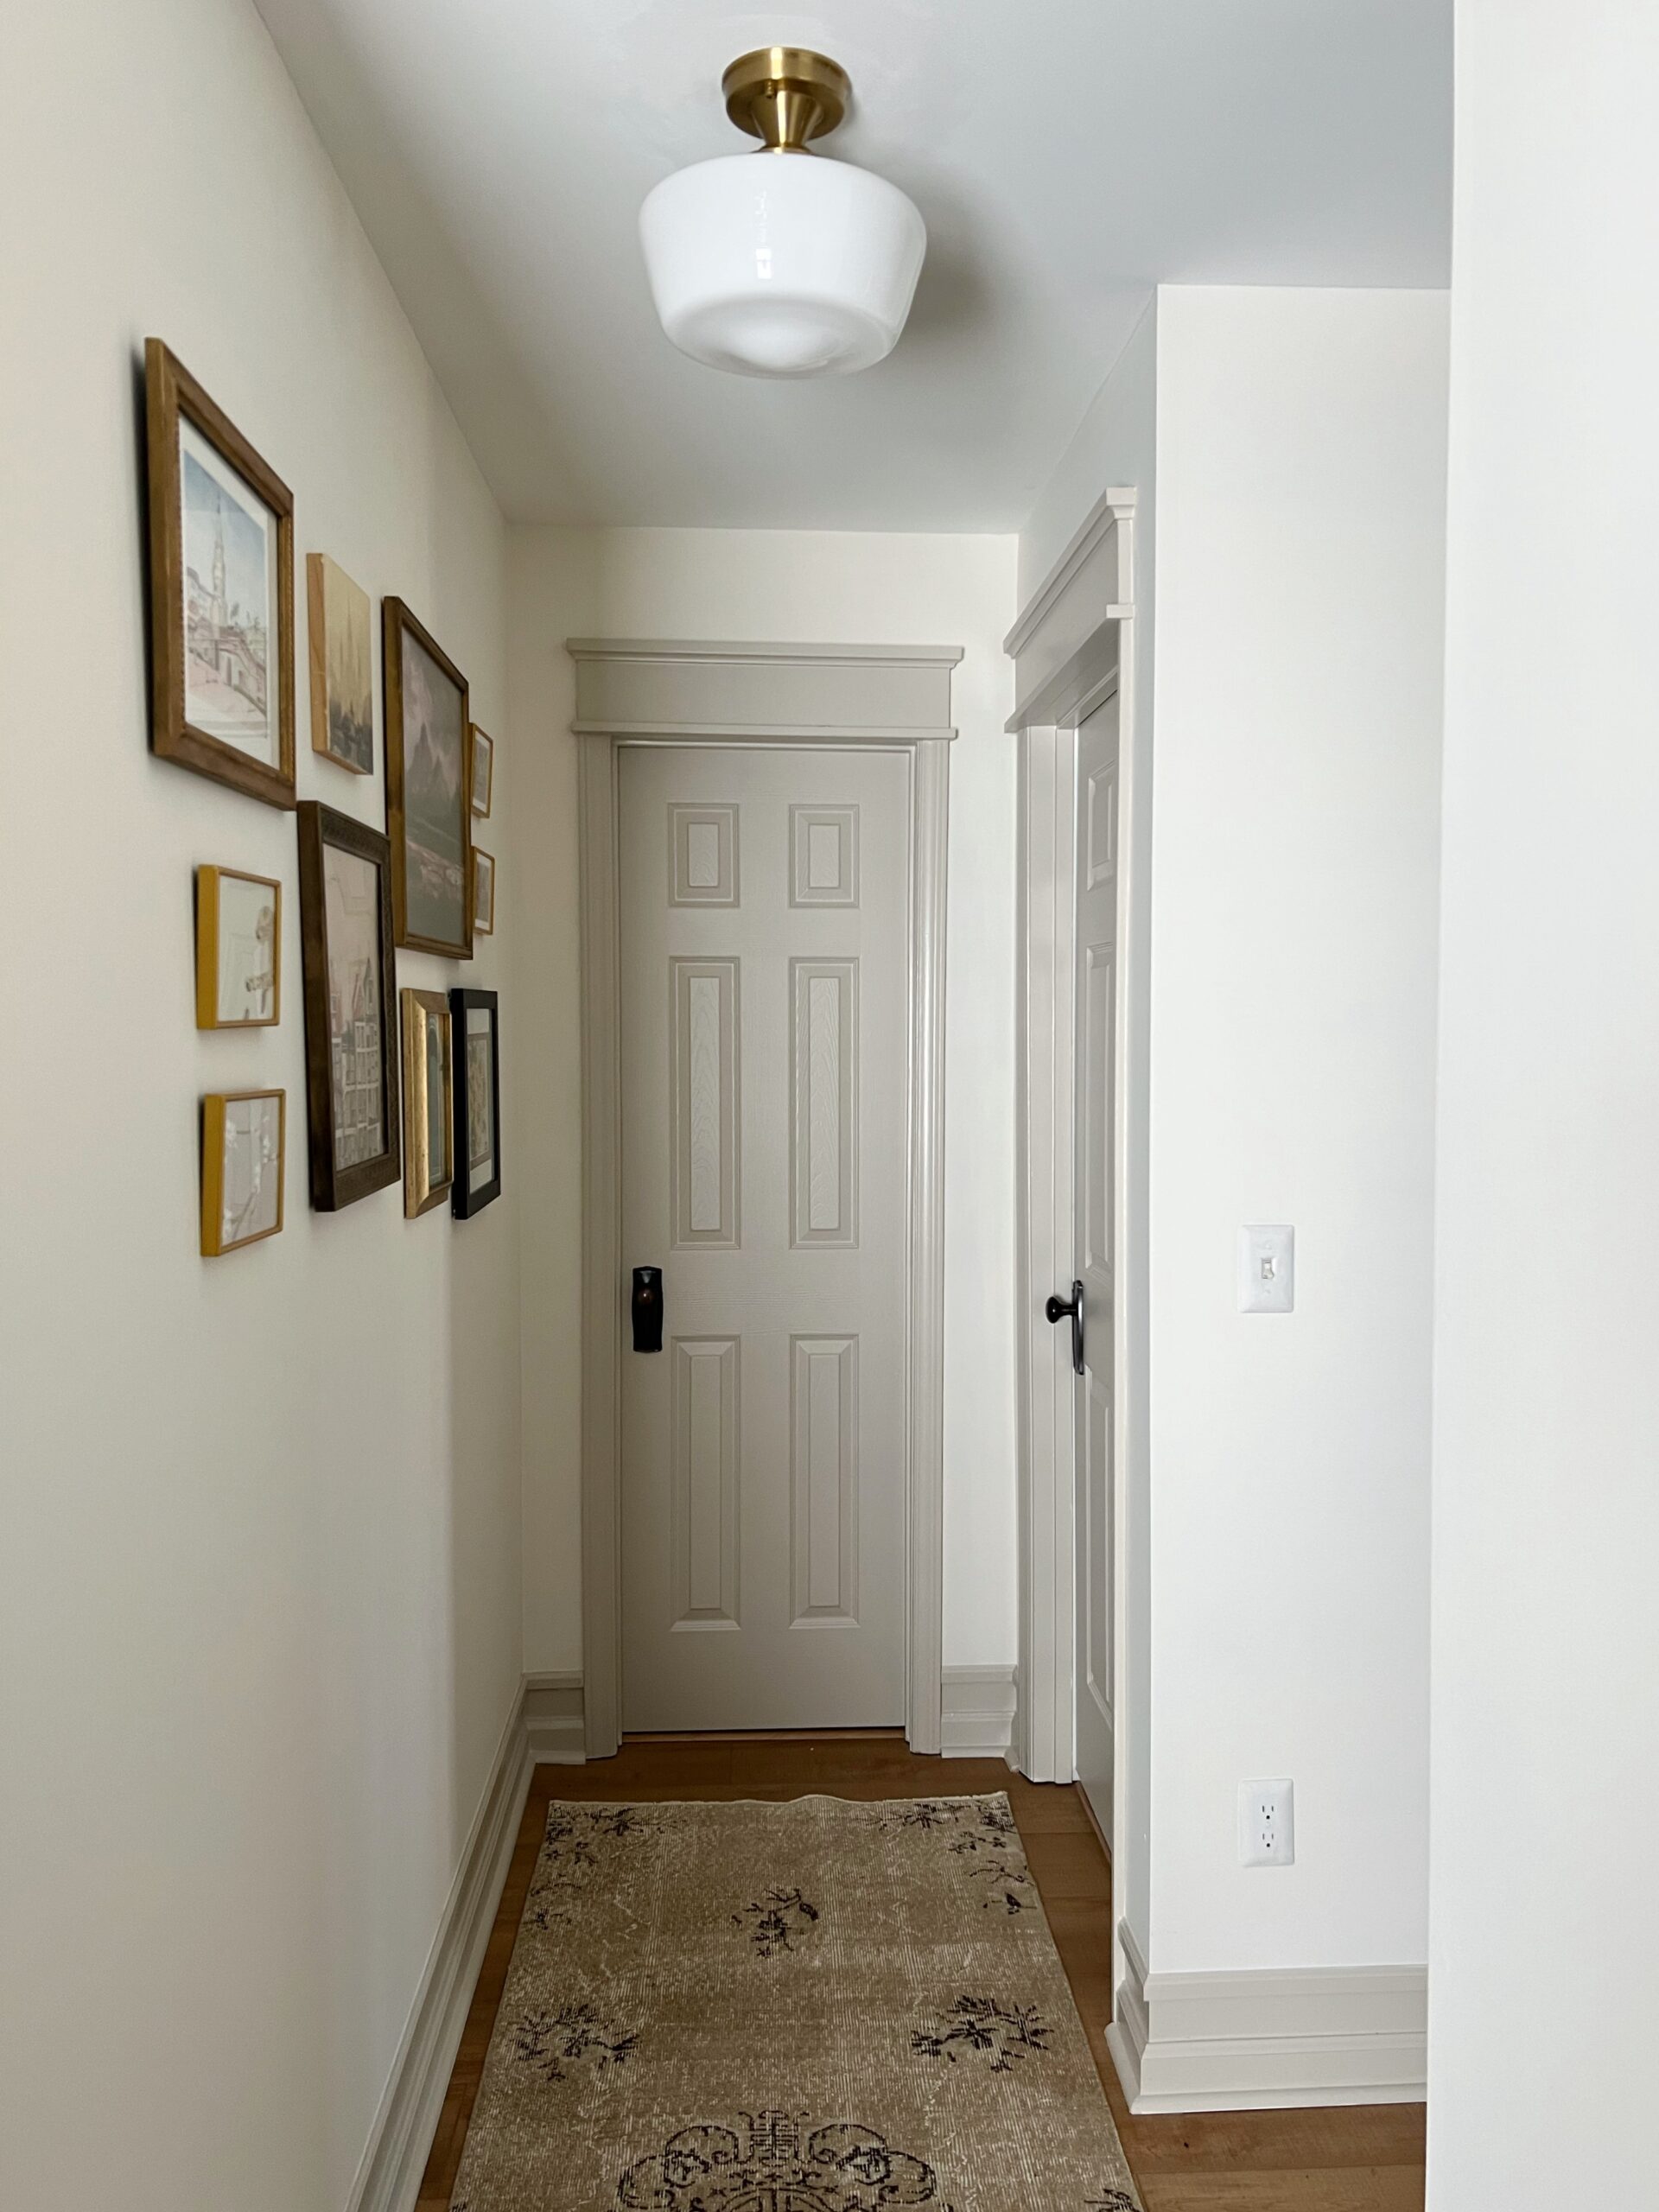
After the wood putty is dry and sanded smooth, it’s time for paint. For the trim color I chose a contrasting taupe trim in the color Sculptor Clay by Behr. I had them color match this color at Benjamin Moore in their Advance line. Advance is an Alkyd paint, which dries super hard making it an excellent choice for trim paint. Traditionally white paint would be used, but I’m loving contrasting trim style these days.
Step 7: Hang Head Casing
Now that all your new header casings are constructed it’s time to hang them on the wall. Eeek! Can you even wait? I was downright giddy at this step. You’ll want to locate your studs and plan to nail the new casing over the studs.
Tip: if you peep inside the door jamb you’ll see screw holes creating the upper doorway frame – this is where the studs are located. Or you could just grab your stud finder. I just stuck a piece of tape on the wall corresponding to these studs for later guidance.
Using a nail gun, I simply tacked up the new trim over the studs using nails 3xs my casing width. No adhesives needed!

Step 8: Caulk Seams
To create a seamless look I then applied a beed of paintable caulk to the same areas I previously loosened up with the utility knife. You’ll want to line where the trim meets the wall, where it meets the vertical original trim as well as the door frame itself.

Step 9: Fill & Touch-up Paint Nail Holes
Once all your trim is painted the same color, it will create a cohesive look and no one will ever know the side/vertical casings were from the old trim work. (sneaky sneaky!)
Next you’ll want to fill and sand the nail holes you created when hanging the new door casing trim. If your nails are poking out a little, you can use a nail set to set the nails deeper to create a nice hole to fill. Once the filler is dry and sanded smooth with 220 grit, then you’ll need to do just a little touchup paint over the filled areas.
Step 10: Grain Fill Edges
You may notice the edges of your new trim have a lot of open grain. if you want a smoother finish, I highly recommend mixing up some wood putty and water until it’s the constancy of a custard. Then using an artist brush, paint the mixture over the edges where the grain is open. Once dry, sand it smooth and apply touch up paint.


And there you have it, a quick and easy update to your interior door frames that can be completed in a weekend. By removing only the top part of the casing and creating a new header with primed boards, you can give your interior a fresh new look without breaking the bank. The taller casings make my little space feel so much bigger by drawing the eyes up and creating the illusion of high ceilings. I’m loving the classic look.


What a huge difference this made! There is such thing as an affordable and demo-lite door casing update! I also painted all the hallway doors, updated the door knobs, exchanged the vent cover and converted the pony wall into a true banister which all has made a huge impact, but the luxe feel comes in the small details like craftsman style trim updates.
Small changes = Big impact! Check out my post on Spray Painting Door Knobs if you’re on a budget or Updating Door Knobs with Nostalgic Warehouse if you are ready for a more permanent update.
You may also like…

Girl Behind the Blog

I’m Jess, the creator of Oak & Grain. A mid-west girl at heart who now resides in Raleigh, NC. I love finding old things and giving them new purpose by way of refinishing or incorporating unexpected, overlooked thrift store finds in the modern home. I work full-time in medicine and I love dipping into my creative side and in the process, keeping my sanity. Follow me on Instagram and YouTube to see more behind the scenes action.
One response to “Easy Craftsman Style Door Casing Update”
[…] it wasn’t set in a period. Quite the opposite, in fact, it had zero style! But when I did my Easy Craftsman Style Door Casing Update I kind of committed to a craftsman look throughout the entire home, or at least a nod to this time […]