
Are you tired of looking at an old, beat-up desk that’s been sitting in your garage for years? Don’t let it go to waste! Do a desk makeover project, instead!
With a little bit of effort and creativity, you can turn it into a stunning piece of furniture that you’ll be proud to show off in your home.
In this blog post, I’ll walk you through the steps of how I transformed a donated desk into a classic and stylish addition to my office.
// diy painted desk // how can I renovate my desk? // desk makeover // desk makeover ideas // how to makeover an old desk with paint // how to paint desk // upcycling an old desk // CREAM PAINTED DESK // HOW TO PAINT FURNITURE // WHITE PAINTED FURNITURE WITH Natural top // desk makeover
DESK MAKEOVER BEFORE


If you’re in need of painted desk ideas you’ve come to the right place! One of my followers was kind enough to donate this desk to Oak | Grain. All I had to do was pick it up. She entrusted me to give this desk a second life so it could be enjoyed for many more years to come.
The previous owner had painted it, probably several times. There were layers of white, green and white again. They had also filled old hardware holes and added pink crystal knobs… probably a nice look for a girl’s room, but it’s time for a classic desk facelift.

Step 1: Strip the Desk with a Chemical Stripper
The first step for this desk makeover process is to strip the old finish and paint from the desk. To do this, I used a chemical stripper, GreenEZ Furniture Stripper and followed the instructions carefully. I prefer to top the gel stripper with a layer of plastic wrap to keep the product moist and therefore activated.
Make sure you wear protective gloves, goggles and work in a well-ventilated area to avoid any fumes.
In need of safety goggles?
Save 10% on Stoggles with code: OAKANDGRAIN10

The chemical stripper will cause the old finish to bubble up, allowing you to easily remove it with a scraper. After scraping the majority of the old paint off with the putty knife, I used Clean & Strip Finishing Cleaner with fine steel wool to remove any residual residue.


Oak and Grain Refinishing is a reader-supported blog. At no extra cost to you, I may receive commission if you click and buy through links on this site. Please review Terms & Conditions.
Step 2: Sanding the Desk
Once the old finish has been removed, it’s time to sand the desk. This particular piece had incredibly thick veneer, so while I would typically reach for a 220 with a veneered piece, I could easily get away with starting at 120 for this piece. I then moved to 220 for a smooth finish.
As you saw from the before photos – the side of the drawers were also in need of a good sand to remove layers and layers of caked on dripping paint.

I plan to paint the body of the desk so a scuff sand to remove any stripper residual and create a smooth base for my paint is all that was needed. As for the top, I plan to keep it natural and restain it so taking extra care to completely remove the old finish was crucial. After sanding with my electric sander I inspected closely with an LED light to ensure there were no residual swirl marks.
I found it easiest for stripping and sanding to remove the top all together. If this is true with your piece of furniture too simply take out the drawers and look a the underside of the top. There are usually a line of screws within the top drawer pockets that you can unscrew. My particular piece was then glued on, so it required some prying off with a crow bar.
Enjoy 10% off SurfPrep products with code: OAKANDGRAIN10


Step 3: Make Repairs
Even though this desk looked really rough, it was actually in great shape structurally aside from some veneer that was gapping from the underside.
Using a blunt needle, syringe, wood glue and clamps I injected glue into the gaps and clamped overnight with my favorite inexpensive clamps from Harbor Freight.


Enjoy 10% off SurfPrep products with code: OAKANDGRAIN10
Step 4: Priming with a Shellac-Based Primer
Next, I applied a shellac-based primer to the desk. For this project I reached for my go-to water based primer, Kilz Restoration. I LOVE this stuff with a capital L because it performs like a shellac, but cleans up like a waterbased product. Is there a better combo?!
The benefits of its shellac properties include blocking bleed through (tannins or knotty shapes seeping into your new paint finish which often times gives a pink or orange color). As with all primers, it also helps with adhesion for your paint and aids in coverage by sealing the surface, reducing its porosity and preventing any absorption of paint into the surface.

Step 5: Painting with an Alkyd Paint
Once the primer has dried, it’s time to add some color to the desk. As always before painting, I sanded the primer smooth with a 220 grit and wipe down with 50/50 denatured alchol/water mixture before painting.
I chose to use an alkyd paint, Advance by Benjamin Moore. I had Ace Hardware color match the batch to Behr’s Sculptor Clay color. (This was left over paint I used from our hallway trim and primary bedroom projects).


PERKS OF ALKYD PAINT
Alkyd paint is a type of oil-based paint that is commonly used for interior and exterior surfaces. One of the key benefits of alkyd paint is its durability. It is more resistant to chipping, fading, and peeling than water-based paints, making it a popular choice for furniture, cabinets, doors and trim.
Similarly to the primer I discussed previously, Advance paint is a water-emulsified paint but the end product is an oil-based in finish. So it cleans up like a water based product, but once all the water in the waterborne makeup evaporates you’re left with the durability of an oil-based finish. Which means… NO TOP COAT! (Geniuses, I tell you!).

I was skeptical at first, because even those “all in one” furniture paints need a topcoat, in my humble opinion. But with alkyd paint I’m not talking topcoat optional, I really mean no topcoat. I had a long discussion with BenMoore paint guys over this topic – they convinced me that top coating would actually weaken the finish.
I applied the paint with my favorite brush, Country Chic’s 1.5′ oval brush. This brush holds the perfect amount of paint and lays in the paint so perfectly every time. What I love about this hand painted desk project is that it’s totally achievable even if you don’t have a sprayer. The self leveling properties of the Advance paint is *chef’s kiss* kinda good.
If you’re needing to brush up on your brushing skills (see what I did there?) check out my post on Painting Furniture Without Brush Strokes.
This painted desk took 2 coats in total. The only downside of this paint is the redcoat time – a whopping 16 hours!
Step 6: Staining & Sealing the Desk Top
To give the desk a unique and classic look, I decided to sand down the top to raw wood and stain it with General Finishes gel stain in Antique Walnut. My favorite way to apply stain lately has been round sponges and wipe back with a clean, neatly folded shop towel.

After 72 hours, I clear coated it with Behr water-based polyurethane in a Satin finish. To apply the poly I used my HomeRight Quick Finish. A super smooth finish was achieved by sanding with a 320 grit between all coats and wiping down with a 50/50 denatured alcohol/water mixture. The result was a warm and beautiful addition to the desk, which really set it apart.


Once the top was stained and sealed and dried I then attached it back tot he top of the desk using a small amount of wood glue and reusing the screws I removed inside the top drawer pockets.
Step 7: Adding Hardware and Giving it Depth
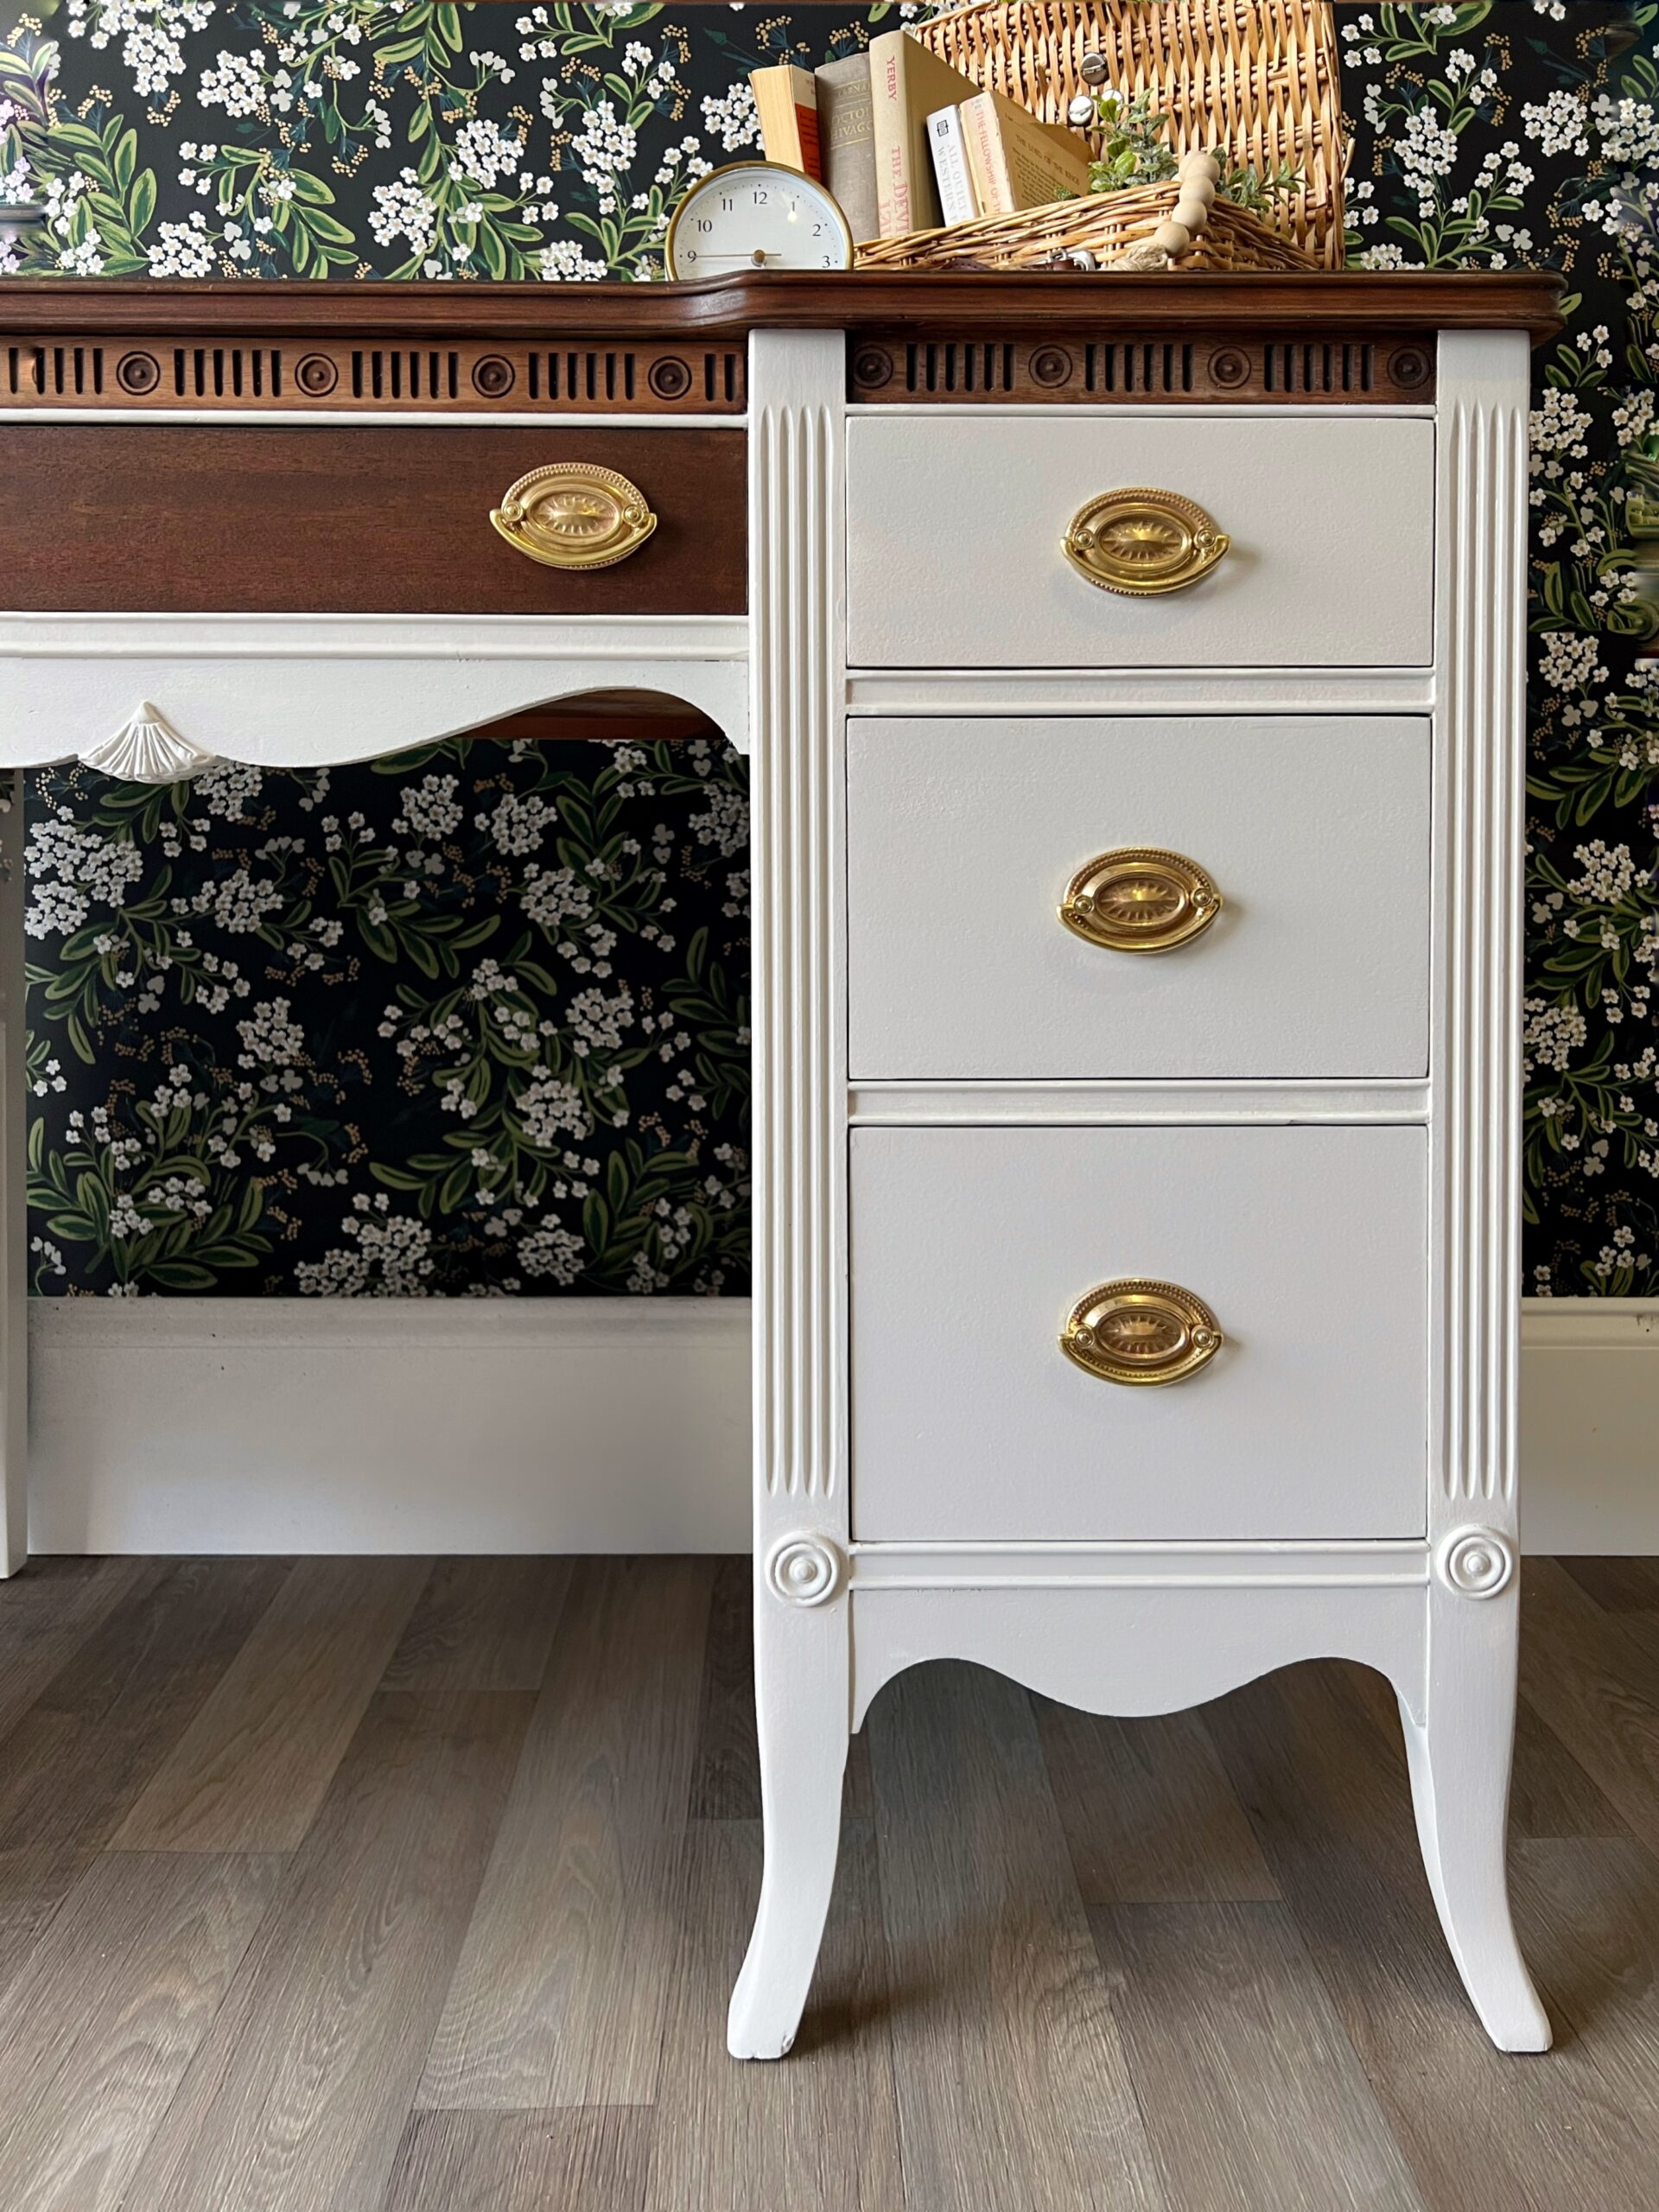
Next step was to decide on hardware. I could tell after sanding down the drawers that the original hardware were oval shaped and contained 2 screws. My best guess was that the originals were Hepplewhite style pulls, so that’s what I went with. I purchase Hepplewhite pulls from Etsy in the original 2.5″ center to center size.
While they fit the piece perfectly size wise, they were a little too bright gold, shiny for my liking. To give it some depth and character, I applied Rub-n-Buff metallic wax to the hardware, which gave it an aged and distressed appearance. The autumn gold gave a nice patina’d look.


Step 8: Staging and Enjoying the Finished Product
Finally, I staged the desk and plan to add it to my office against this fun Riffle Paper Co Wallpaper. The result was a beautiful and functional piece of furniture that I’m proud to show off. With its timeless design and classic colors, it’s sure to be a cherished part of my home for years to come.
In conclusion, upcycling an old desk is a great way to give new life to a piece of furniture that might otherwise have been discarded. I’m so grateful my generous follower saw the hidden beauty in this one and passed it down to me to revive.
By following these simple steps in this desk makeover, you can create a stunning piece of furniture that’s both functional and stylish. So go ahead and give it a try, you might be surprised at how beautiful the finished product can be!


Girl Behind the Blog

I’m Jess, the creator of Oak & Grain. A mid-west girl at heart who now resides in Raleigh, NC. I love finding old things and giving them new purpose by way of refinishing or incorporating unexpected, overlooked thrift store finds in the modern home. I work full-time in medicine and I love dipping into my creative side and in the process, keeping my sanity. Follow me on Instagram and YouTube to see more behind the scenes action.