
Picture frame molding is a type of decorative trim that can add a dose of elegance to any room. I talk about this type of treatment as one of the many wall treatment options over in my post on “Wall Treatment Ideas” and thought I’d take a stab at it for our guest bedroom refresh! If you dig those luxurious feels you may want to try this one too!
One of my trolls over on Instagram commented on my picture frame molding video, “Why bother?” So I guess it’s fair to answer the questions, “What is purpose of picture frame molding?” I feel like it’s obvious – character, eye candy, elegance, luxurious feels, the list goes on.
Throughout the process, even before paint, I kept saying to Kevin, “It looks so grand in here!” Crazy how much just a thin little piece of trim can really draw the eyes up and around the room.
However, hanging picture frame molding can be intimidating if you’ve never done it before. So in this blog post, I will guide you through the process of hanging picture frame molding step-by-step. I’ll include real life obstacles and how I problem solved my way through them. (Similar to the detail and realness I focused on in my “How to (really) Hang Board and Batten” post).
First, let’s get into some common questions about hanging picture frame molding so you too can create a room so grand it doesn’t feel like the same space!


HOW MUCH SPACE BETWEEN BOXES?
I personally left 4 inches of space horizontal between trim boxes and 3.5 inches between the vertical trim. The 3.5″ spaces was a cinch because I used a 1×4 spacer meaning NO MEASURING! However, I’m not sure why I didn’t just use the same spacer for there verticals too to keep life easier.
I would recommend using a spacer between both horizontal AND vertical orientation of your trim. I think sticking with a 1×4 or 1×5 would look best for most spaces.

How far apart should picture frame molding bE?
For the width, it depends! My picture frame box width range from about 12 inches on the smallest wall to 32 inches on the largest wall. My advice is to grab some tape and tape off pretend boxes to help visualize it.
What height should picture molding be?
For my 8 foot ceilings, I found that 24 inch tall lower boxes and 59 inch tall upper boxes were a perfect fit. Keep in mind, however, that I do not have crown molding. If you do, you may want to make your upper boxes a bit shorter.
FOCAL POINTS TO CONSIDER:
You may also want to consider things like centering a large piece of furniture or TV within one of the boxes when planning your design. If you have art you plan on hanging, make sure the number of boxes will allow you to center these and make sure they’ll be wide enough to accommodate the frames. Same goes for a TV or piece of furniture.
For me, I was just so excited to get started I didn’t plan any of this, but wish I would have! I would have centered one large box around the bed instead of keeping them all even on the wall that the bed sits on. This also would have cut back on costs a bit. Which brings me to my next common question…

ARE THERE WAYS TO MAKE IT MORE BUDGET FRIENDLY?
Yes! I know lumbar costs are at an all time high, but not to worry. There are several ways you can get this same, luxurious look but saving a little on material.
For starters I omitted the chair rail in my design. Adding molding to the entire perimeter of the room would have definitely added to the total cost of material. I think, even without this detail, you can still get a very grand look.
Another way to cut back on material would be to create less boxes. Seems obvious, but the larger the boxes the less vertical material you’ll need.
In addition, leaving more between the boxes horizontally and vertically will help cut back on amount of trim material.
Supplies You’ll Need:
- Painters tape
- Tape measure
- Laser level (with stand)
- Miter saw or miter box or miter sheers
- Nail gun
- 1×4 or 1×5 scrap wood (or whatever size spacer you decide to use)
- Wood filler
- Caulk and gun
- Stud finder
- 220 grit sand paper
- Paint
Oak and Grain Refinishing is a reader-supported blog. At no extra cost to you, I may receive commission if you click and buy through links on this site. Please review Terms & Conditions.
How to Hang Picture Frame Molding Step-by-Step
1. Measure Your Walls & Draw it Out
The first step is to measure the length of the wall where you want to hang the picture frame molding. I found that using tape to make pretend molding really helped visualize how many boxes you may want on each wall.
How to measure for picture frame molding
Total distance of wall – (distance between each box x total number of boxes +1) = total width of boxes
total width of boxes / number of boxes = width of each box from outside edge
2. Measure & Cut Molding
Once you have marked the wall, it’s time to measure and cut molding. Use a miter saw to cut the molding at a 45-degree angle at each end. Make sure to measure twice and cut once to ensure that the pieces fit together snugly.
how to hang picture frame molding
I personally found it easiest to cut the first piece by measuring to the long edge. After that, you can put your measuring tape away and mark exact distances by the short end. Then work goes a little more quickly.
Be sure to draw yourself a guideline so you know which direction to make the cut once you get to your miter saw.


REAL LIFE PROBLEM: WARPED TRIM
Despite your best efforts, you’ll probably get a few less than perfectly straight boards. That’s ok! Here you can see one of the boards bows slightly in the middle. My advice – when measuring, just let it be. Don’t try to force them together when measuring or they won’t be the same length in their natural curved state when hung on the wall.

3. Hang Molding
Before you start to hang the molding do yourself a favor and take the time to mark all your studs with a small piece of tape. When you go to attach your horizontal pieces try to hit as many studs as you can for extra security.

To hang the molding, start by marking the spacer distance from the corner with a piece of tape and set up your laser lever in line with the tape edge. Dry fit the vertical trim as well as the bottom trim using your space (in my case the 1×4 scrap) using your laser level to ensure everything is level.
how to hang picture frame molding
Use a nail gun to secure the molding to the wall at each corner and about ever 12 inches. Remember – you’ll have to fill all those nail holes so don’t go too crazy.
I didn’t end up using any adhesives. Instead, I tried to hit studs over the horizontal pieces. For the vertical trim applications I alternated directions of the nails which makes it surprisingly secure. To secure it further, I used my nail gun parallel to the wall to tack a nail into the horizontal pieces at the corners.

ESSENTIAL TIP:
Be sure to dry fit and hang 2 pieces at a time! I made the mistake of attaching the bottom and vertical pieces to the wall to find out the top piece didn’t fit. To prevent this, hang the bottom and only one vertical piece at a time.
Then adjust your level and move onto hanging the 2nd vertical piece with the top. You can fudge the corner angles a bit, but keeping the trim parallel to the floor/ ceiling and corners is key to keep the eyes happy.


REAL LIFE PROBLEM: HOW TO HANG TRIM ON WALLS THAT AREN’T FLAT
Especially if you live in an older home, you probably have realized that many walls are not completely flat. Here you can see how my trim is bowing out from the wall.
How I worked around it – placing the trim on the wall in the desired position rock the trim back and forth to find the fulcrum or pivot point. I drew a part on the trim where it seemed to not be loosing contact with the wall.
I then took an 80 grit sand paper and carbide scraper to this isolated area and thinned out the trim until it naturally laid flatter on the wall.


4. Work Around Obstacles
Luckily, I didn’t run into any light switches or outlets. I did, however, have a run in with this awkwardly placed smoke detector. I found the best way to work around it was to take it one piece at a time. I didn’t necessarily measure anything around the device, but eye balled to keep an equali-ish distance from the obstacle. Of course, I adjusted my laser level to aid in the alignment.
I started by making actual marks on the pieces of trim to puzzle piece together the detour. I then dry fitted everything with tape before attaching them to the wall.


5. Fill & Sand Nail Holes
Congrats! You’ve made it this far. You’ve figured out how to hang picture frame molding. Now for the finishing detail work. Use wood filler to fill in any nail holes. Once the wood filler is dry, sand it smooth with fine-grit sandpaper.

While you have your sand paper out, nows a great time to smooth out any jagged corners. Sanding gently at an angle over the corner edges can create a really nice rounded, smooth corner.


6. Caulk All Seems
Holding the caulk gun at a 45-degree angle to the seam, apply a steady, continuous bead of caulk along the entire length of the seam. Then using a wet finger or damp cloth, removing any excess and creating a neat, even finish.
Just make sure to use a paintable caulk and wait the recommended drying time before painting.

7. Paint
Now for the fun part – grab your paint color of choice and get painting! The only downside to this trim detail is the amount of cutting in and hand brushing you have to do. I promise, it’s worth it tho!
I used Samplize to help narrow down paint colors for this room.

Choosing paint colors has never been so simple with Samplize peel-n-stick samples!
In conclusion, hanging picture frame molding is a great way to add character and charm to any room. By following these simple steps, you can easily install picture frame molding yourself and achieve a professional-looking finish. With a little patience and attention to detail, you can transform your walls into a work of art.
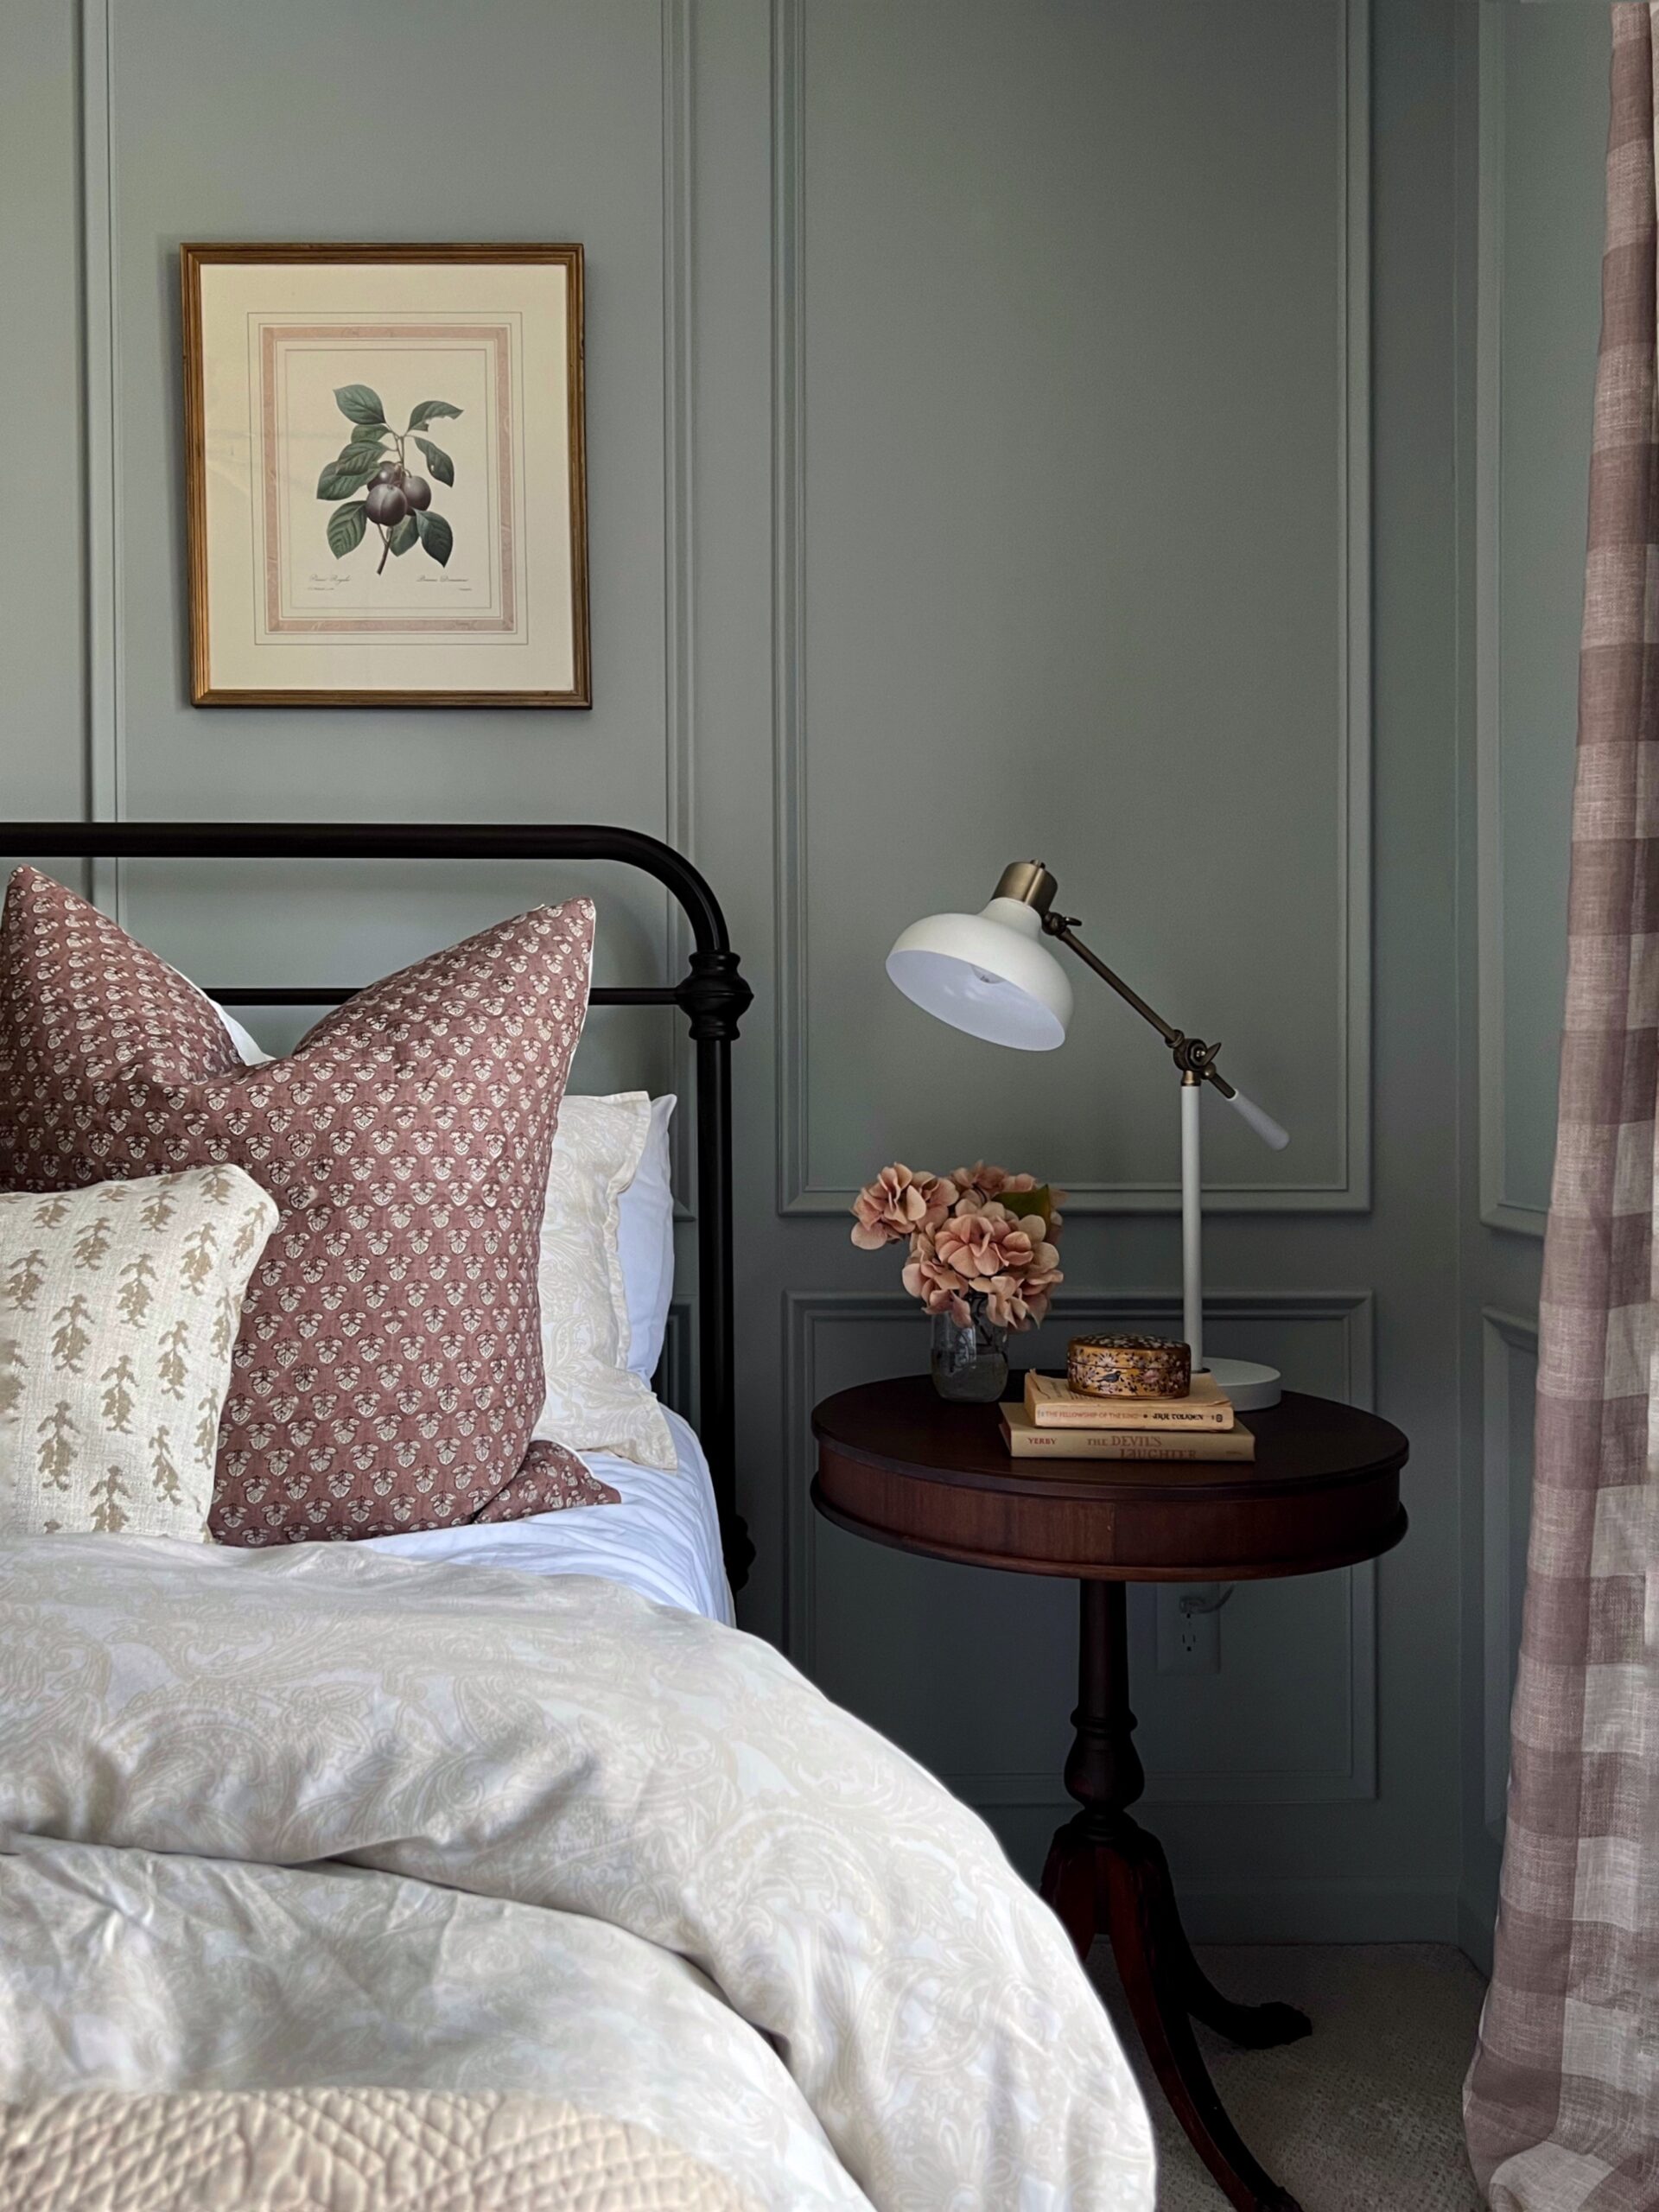
I still have a lot of details to get together, but for staging purposes I wrapped a pillow in left over fabric and stole a table from downstairs to use as a night stand, hehe. I’m also not sold on the curtains, but they will do for now.
I’m so happy with how the bedroom turned out! It’s something I’m super excited to show off to our guests.

You May Also Like…

Girl Behind the Blog

I’m Jess, the creator of Oak & Grain. A mid-west girl at heart who now resides in Raleigh, NC. I love finding old things and giving them new purpose by way of refinishing or incorporating unexpected, overlooked thrift store finds in the modern home. I work full-time in medicine and I love dipping into my creative side and in the process, keeping my sanity. Follow me on Instagram and YouTube to see more behind the scenes action.