
If you’re looking for a great way to refresh an old lampshade without spending a fortune, this DIY pleated lampshade tutorial is for you! Using a thrifted shade, left over fabric, and a hot glue gun I created a custom lampshade cover for a fraction of the price of store-bought options!
After over a year of searching for the perfect second nightstand for our guest room after our Guest Room Makeover, I finally scored this adorable Duncan Phyfe nightstand with a dainty little Hepplewhite pull for just $21 on my favorite online auction site, HiBid.com. Naturally, that meant I needed a lamp for this side of the bed!
I already had a small, cream-colored thrifted lamp base, but it came with a mismatched light blue lampshade which wasn’t exactly the look I was going for. I’ve had my eye on this printed pleated lampshade for while now, but at $79 it wasn’t in the cards for this quick nightstand styling. So I figured, let’s make our own! Luckily, for this pleated lampshade project, the shade’s color or pattern doesn’t matter—as long as it’s the right size for your lamp base, you’re good to go!


Materials You’ll Need:
✔️ Old lampshade (empire or drum)
✔️ Enough fabric to cover the shade (The amount will determine on the size of the shade)
✔️ Hot glue gun and glue sticks
✔️ Tape measure or yard stick
✔️ Scissors or rotary cutter
✔️ Iron (for pressing fabric)
Oak and Grain Refinishing is a reader-supported blog. At no extra cost to you, I may receive commission if you click and buy through links on this site. Please review Terms & Conditions.
I started with an empire shade (which has a tapered shape) and a thrifted lamp—both found at my local thrift store. My goal was to give it a pleated look with strips of fabric, and I love the huge impact it made in our guest room! Here’s a step-by-step tutorial so you can make your own pleated fabric lampshades at home!


Step 1: Measure & Cut Fabric Strips
If you have wrinkle prone fabric, I recommend getting out your ironing board to press the fabric before getting to the cutting part.
First, measure the distance between the top of the lampshade and bottom edge of the shade to determine how long of strips you’ll need. My lampshade was about 7 1/2 inches, so to give me plenty of wiggle room I cut my strips to 8 inches.

Next, using my rotary tool, I cut 8-inch-long x 2-inch-wide strips of fabric—the length and width of the fabric can vary depending on the size of your shade. Overlapping these strips will give us the pleated look.

Step 2: Press a Fold on the 2inch Strips
After strips are cut (you may have to go back later and cut more) you’ll want to grab your iron to press a fold.
To prepare the fabric edge for gluing, start by folding over about 1/4 inch of fabric along one of the edges. Use your fingers to lightly crease the fold, then set your iron to the appropriate heat setting for your fabric type. Gently press the fold with the iron moving along slowly to create a crisp edge.

Step 3: Attach the Fabric with Hot Glue
I worked one strip at a time, securing each piece of fabric with a small bead of glue at the top rim leaving the end at the bottom of the lampshade loose.
- Start at the seam on the old lampshade to establish a perfect vertical positioning. Glue the strip of fabric to the top of the shade.
- Pull it straight down
- For now, leave the bottom piece unattached – this will give us more wiggle room for how much overlap we may/may not need over the bottom of the shade.
- Continue with the next strip of fabric, slightly overlapping the previous pleat ensuring that your ironed, clean edge is the edge that’s exposed.


TIP: If you’re using a tapered lampshade (like an empire shade), you’ll need to slightly overlap more at the top of your shade to keep the pleats vertical. Drum shades don’t require as much adjustment! Either way, you may find it helpful to avoid gluing the bottom until you have all the pieces attached to the top.

As you approach the full circumference of the lampshade you may be asking, “How do apply the last few strips under the first piece that I’ve already attached?”. Simply – we are going to create the illusion of an overlap here. Line up the last strip where you want it, then take your scissors and make an angled cut along the line of the first strip we placed.

Shimmy the bottom portion of the last strip beneath the first strip and hot glue the top just like the rest of the strips you applied. (This part of the reason I’ve held on off gluing down the bottom). You’ll see in the photo below how seamless this looks cut an an angle. You can’t even tell it’s not actually sitting under the next piece of fabric.

Step 4: Hot Glue Bottom
Once all your strips are attached the the top of the shade, it’s now time to glue down the bottom pieces. Run a long string of hot glue over the bottom of the shade, working in sections. Next, press the fabric into the glue, overlapping as needed to ensure the lampshade underneath is not exposed

Step 5: Trim Excess Fabric at Top & Bottom
Next, with all your strips securely attached to the shade with hot glue, trim away any excess fabric over the top and bottom of the shade. This will reduce the bulk of fabric when applying your next trim pieces.

Step 6: Finishing the Edges
Once all the pieces of fabric are attached, cut a long 2inch strip of fabric to wrap around the top of the shade and another for the bottom edge of the shade. You can use the same fabric as the pleated portion of the shade or select a contrasting fabric for a more defined pop of color. Either fabric you use, these trim pieces will give the shade a clean edge.

Using the same technique – press a fold then run a line of glue along the top pleats, pressing the bottom strip in place.

Repeat this at the top of the lampshade for a finished look. Depending on how small your particular lampshade is, you may find it helpful to create small notch cuts along the fabric’s edge. This will allow the fabric to overlap neatly without creating bulky folds. As you wrap the fabric around the shade, these cuts help it conform to the curve, ensuring a seamless look. Once in place, a bit of hot glue will secure everything.


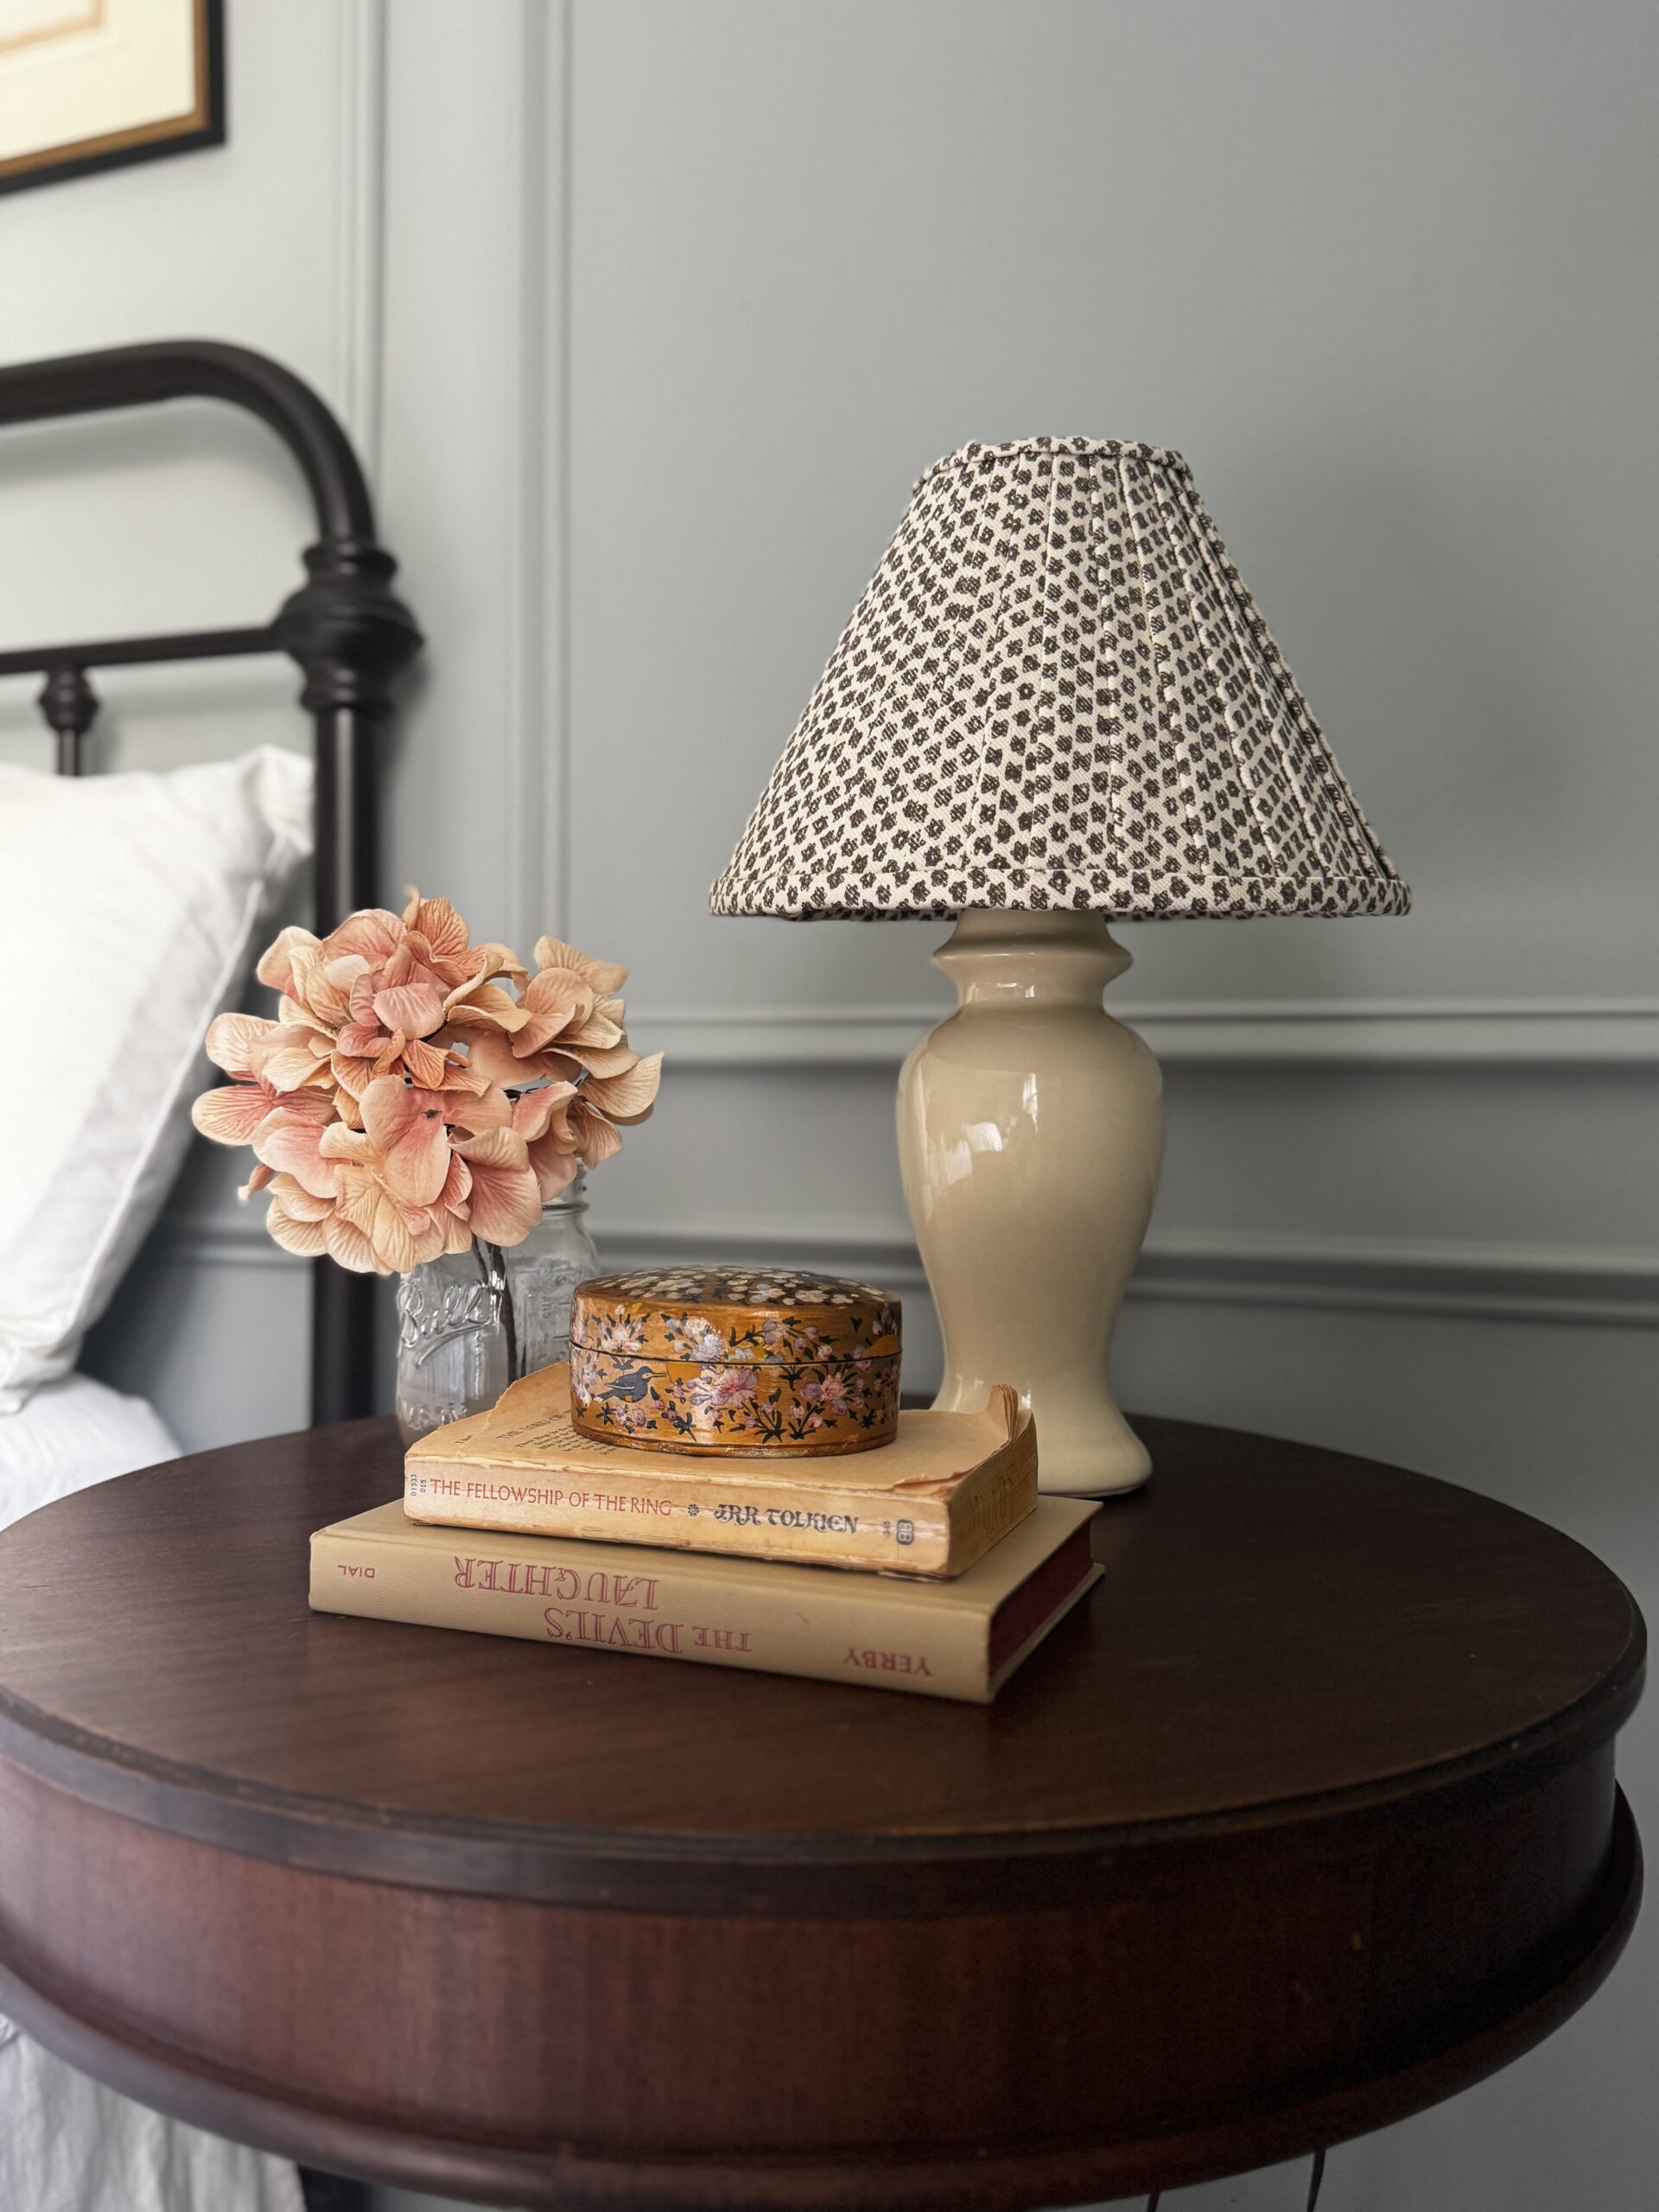
Final Result: A Custom Pleated Lampshade!
The end result is a gorgeous lamp with a completely custom lampshade cover! Whether you’re sprucing up a guest room nightstand, refreshing an outdated plain lampshade in the living room, or wanting to add a custom touch anywhere in your home, this easy DIY project makes a huge impact.

I love how this lampshade makeover transformed our guest room—with just a little glue and some excess fabric, I created a custom look that perfectly fits our space. If you have a thrifted shade in need of a refresh, this easy tutorial is a great way to breathe new life into it. Plus, it sure beats the price tag of a brand-new lamp and shade!
Would you try this DIY home decor hack? Let me know in the comments!
You may also like…
Keywords: diy pleated lampshade / how to make your own pleated lampshade / no-sew pleated lampshade / how to makeover a lamp / lamp transformation / pleated lampshade tutorial / diy pleated lampshade without sewing

Girl Behind the Blog

I’m Jess, the creator of Oak & Grain. A mid-west girl at heart who now resides in Raleigh, NC. I love finding old things and giving them new purpose by way of refinishing or incorporating unexpected, overlooked thrift store finds in the modern home. I work full-time in medicine and I love dipping into my creative side and in the process, keeping my sanity. Follow me on Instagram and YouTube to see more behind the scenes action.