
If you want to add instant charm to a space, open shelving with brass gallery rails are something you should highly consider! In my dream board for our kitchen, I had high hopes for brass gallery rail shelving from the beginning. And boy am I glad we found the space to utilize them in the design. It’s the perfect combination of function AND style!
While we hired this project out, I watched the carpenter very closely throughout the project. About a third of the way through I wished I would have taken a stab at it as a DIY project to save some money.
So now, after watching the pros do it I feel like I could save you the labor cost of hiring out a similar project. What’s the old sang…? See one, do one, teach one? We are just a little out of order on the “do one” part of it.
WHAT IS A GALLERY RAIL?
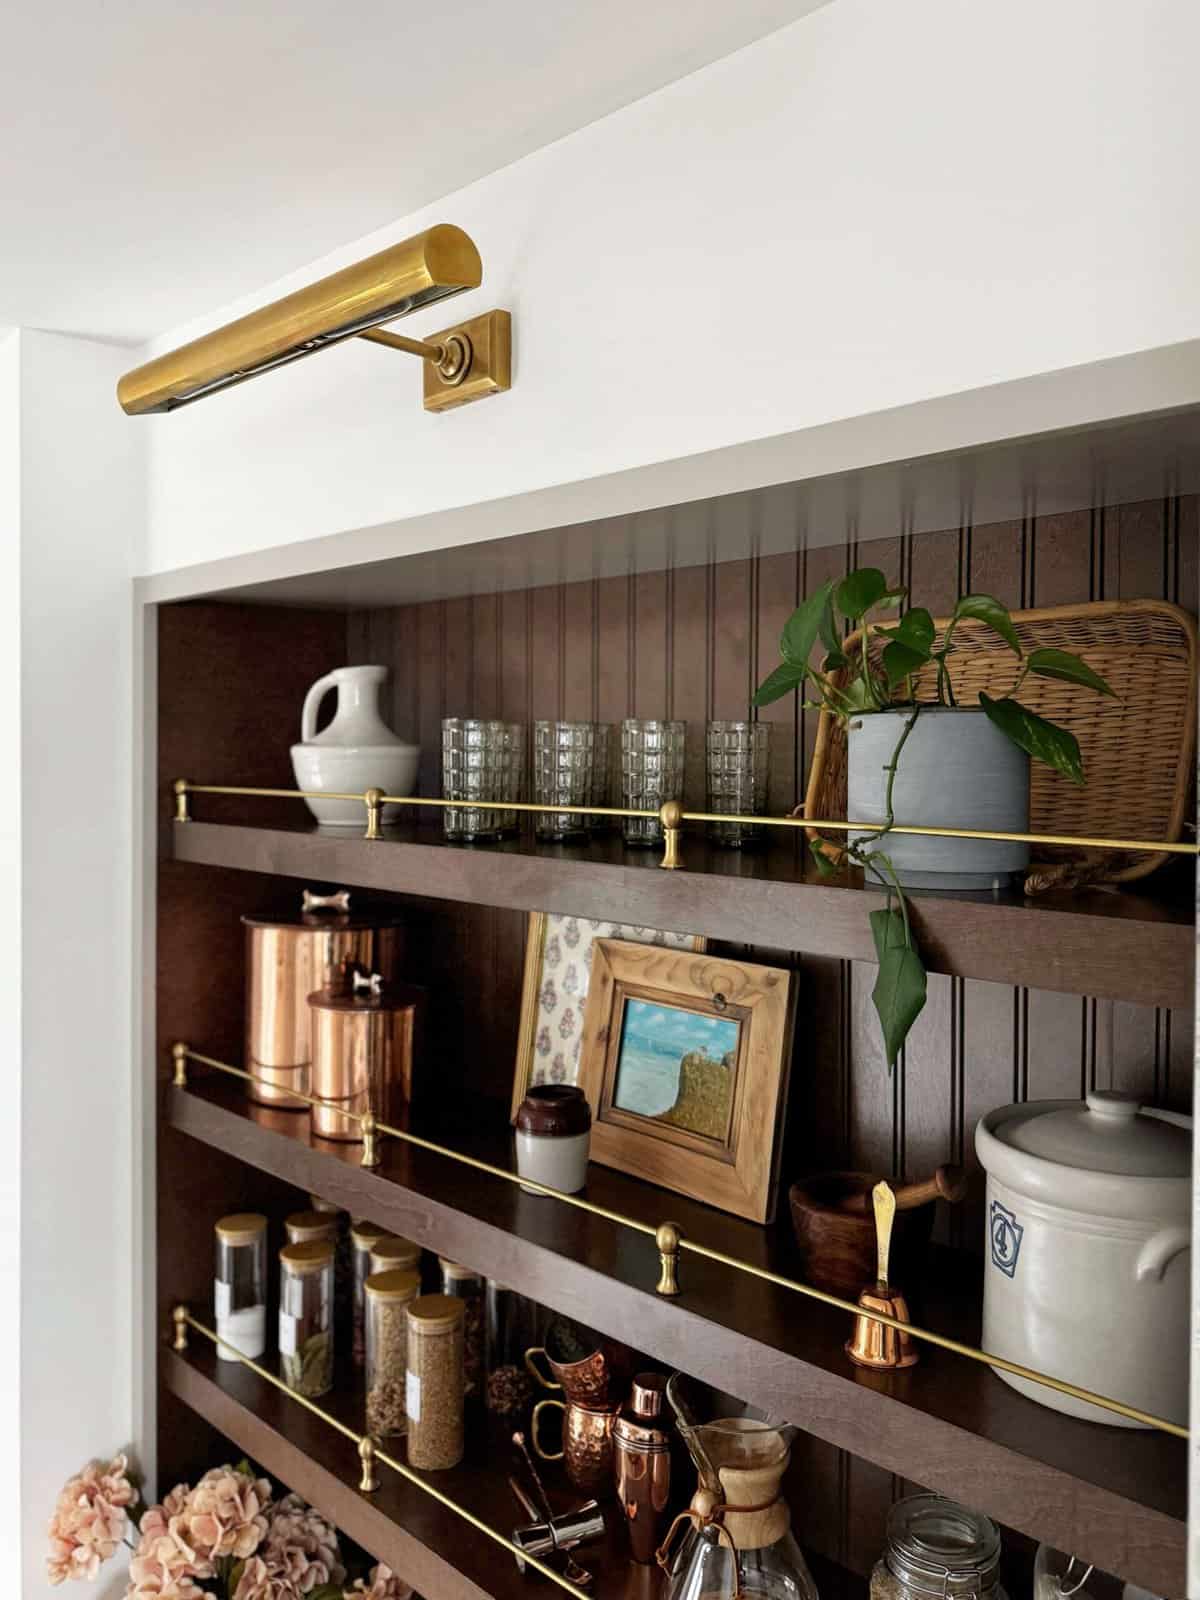
Also known as a tipping rail, these thin metal rods run along the edges of the shelves serving both a functional purpose of avoiding things like plates from tipping forward (hence the name) and also add loads of charm.

HOW TO BUILD SHELVES WITH GALLERY RAIL?
MATERIALS:
Shelf material –
We ended up using cabinet end panels for this project which make it a bit more difficult than if we just used regular wood. We found that the material splintered much more easily in the cutting process and demanded a brand new, fresh fine table saw blade.
We opted to use cabinet end panels in our same kitchen cabinet line because we plan to do additional cabinetry in the dining room and I wanted the shelves and new cabinets to match perfectly.
However, because the material was pre-finished it did save significant time on sanding, applying wood conditioner, staining and top coat application that would have been required had we used a regular type of wood.
Brass gallery rail –
You likely won’t find these brass gallery rail materials at a typical home improvement store. You’ll need to shop vintage hardware stores.

Brass posts –
These posts from Paxton Hardware came with two options of attachment. 1) a wood screw that you manually screw into a pilot hole. 2) a machine style threaded screw that screws into the post itself with a backing more similar to most hardware attachments.
Because we were creating a box style shelf we went with the machine screws because you won’t be able to see the screw with the final product.

STEP BY STEP PROCESS
1) Hang bead board
Whether it be bead board or whatever you choose to use for your back piece. If just the wall, make sure the wall is painted before hanging the shelves. If you have a seam in the back piece you’ll want to calculate where to line up the seams so they are hidden and broken up behind a shelf.
For the sides of the “hutch” we used the same walnut color, but in flat cabinet panels instead of the bead board texture. This really gave it that cozy, moody feel with the dark enclosing.

2) Adding face frame
After adding the side panels to the walls, the carpenter utilized the pre-cut 1.5 inch cabinet spacer trim pieces from our cabinet line. He added one on each side and just under the soffit where the side pieces meet the top edges.

3) Create shelf brackets out of 1x2s
Using 1×2 boards, create a bracket for your shelf to sit on. Be sure to attach over the wall studs using wood screws.

4) Measure & cut the top and bottom shelf pieces
Once you have a shelf bracket secured to the wall, you’ll want to cut the top and bottom pieces of the shelf. Our carpenter used a table saw to cut down the cabinet panel pieces.
For a really seamless look, he mitered the front edges of each piece… you’ll see how this makes a huge impact when we get to adding the front panel piece.
5) Attach brass end and through posts
Drill through the bottom of the shelf top piece and attach brass posts then slide brass rods through posts.
I ended up purchasing the 72 inch length brass rail knowing we would need to trim it down. You’d need a bolt cutter or metal blade on an ossilating tool to trim it down to the perfect size.
We attached the end posts then two through posts for each shelf, equally separated.

6) Attach top of shelving to the shelf brackets
Attach the top of the shelf box to the bracket using brad nails 2x the thickness of your shelf material.

7) Attach bottom of shelf to wall brackets
Next, attach the lower shelf so the mitered edges create a “V” shape for the front panel, also using brad nails.

Creating a box like this gives the look of a thick wood shelf without the cost of all the guts in the middle.
8) Cut & attach front panel
Next you’ll need to measure and cut the front panel piece, again using mitered edges.
Using wood glue and small brad nails or pin nails, attach the front panel to the top and bottoms shelf pieces.


9) Touch ups
Touch ups came easily using the cabinet line touch up kit to fill and sand the brad nail holes. If you’re using normal would, I would use Mohawk fil-Stiks for this step.
10) The fun part – styling!
Here’s the part where you can really add in your personal style. Display your favorite open food storage solutions, thrift store finds or set it up like a coffee bar. It’s been so much fun playing around with them striking the perfect balance of functional storage, but also displaying pretty stuff.


Are there cheaper alternatives to brass gallery rails and posts?
We went with solid brass rails which were a little pricer than faux alternatives, but I knew these would get plenty of wear so it was essential that they hold up. If you want a good faux alternative check out Our Aesthetic Abode’s post where she used wooden dowels and chess pieces to create a similar look.
Why you should add brass gallery rail shelves…
Open shelves create an illusion of more space, especially in smaller kitchens. By eliminating the visual bulk of closed cabinets, the kitchen feels larger and more open. The metal rods are simply the stylistic icing on top!
I absolutely love the new look and it’s turned out to be one of my favorite features in our new kitchen. The fun decorative detail is the touch of luxury that our small kitchen needed to elevate the space. The additional storage is also a huge plus!
I’m planning on using the left over brass rails to create a custom spice rack! Stay tuned…
You May Also Like…

Girl Behind the Blog

I’m Jess, the creator of Oak & Grain. A mid-west girl at heart who now resides in Raleigh, NC. I love finding old things and giving them new purpose by way of refinishing or incorporating unexpected, overlooked thrift store finds in the modern home. I work full-time in medicine and I love dipping into my creative side and in the process, keeping my sanity. Follow me on Instagram and YouTube to see more behind the scenes action.
Keywords: Vintage brass gallery rail shelf // how to build floating shelves with railing // tipping rail on shelving in kitchen // open shelves with brass gallery rail
2 responses to “How to Build Open Shelves with Brass Gallery Rail”
[…] Build Open Kitchen Shelves with Brass Gallery Rails […]
[…] Building Open Shelves with Brass Gallery Rail […]