
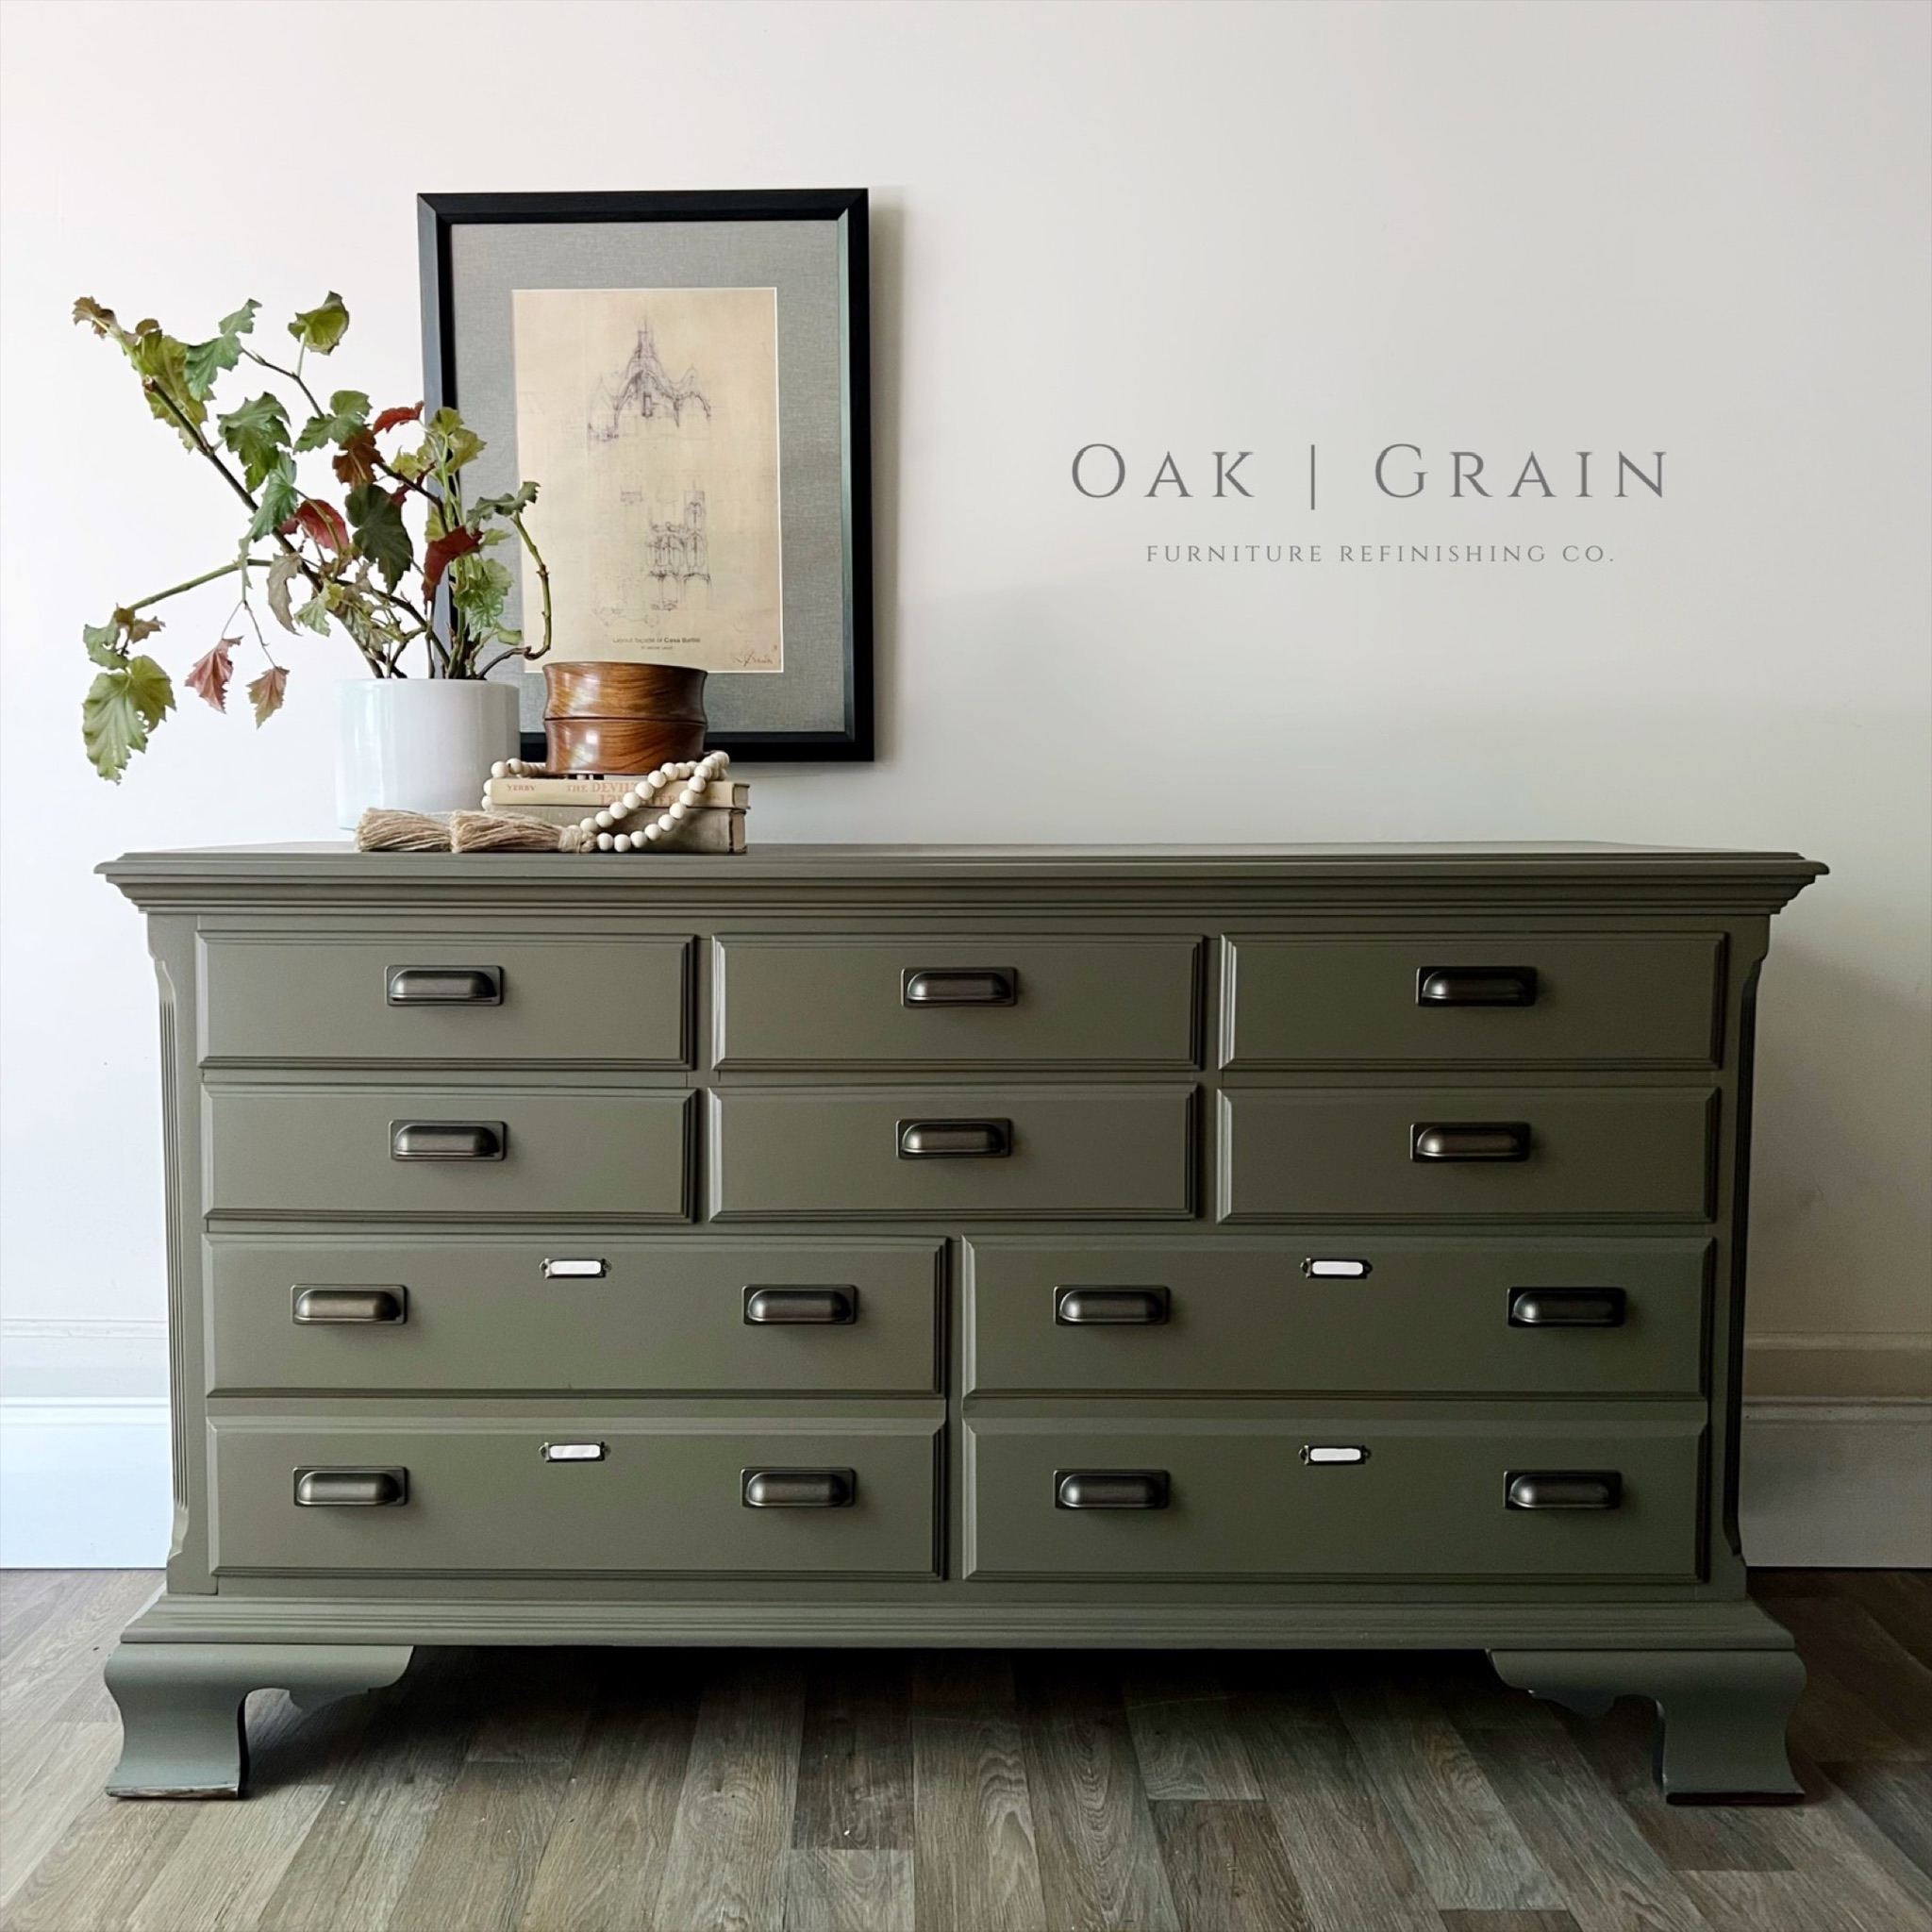
Upcycling an old piece of furniture is a great way to add some personality to your home without breaking the bank. One piece that can be particularly fun to revamp is a dresser, especially an outdated one with good bones. I’ll share the step by step of this show stopping green painted dresser.
If you have an outdated dresser that’s taking up space in your home, why not give it a fresh new look? In this post, I’ll show you how to paint an outdated dresser green to give it a completely new and unique look.
Your friends will be left asking, “Where did you get that?” and you’ll be proud to say that you refinished it! Refinished furniture truly creates a home that’s authentic to you and that can’t be replicated.
Let’s dive in how I refinished this outdated Chippendale style 90’s dressing into a beautiful green painted dresser.

To paint an outdated dresser green, you’ll need the following materials:
- Green paint (I used Melange in Restoration Bronze)
- Electric sander
- Sandpaper (220 grit, 320 grit and 600 grit)
- Krud Kutter
- Rags for cleaning
- 50/50 denatured alcohol with water
- Wood filler
- Putty knife
- White Primer
- Black Primer (AquaLock in Black)
- Drop cloths
- Sprayer (I’m using my HomeRight Super Finish Max)
- Protective mask (N95)
- Protective goggles (I use Stoggles which are adorable. Save 10% with OAKANDGRAIN10)
Oak and Grain Refinishing is a reader-supported blog. At no extra cost to you, I may receive commission if you click and buy through links on this site. Please review Terms & Conditions.
1. Start by removing hardware
To get started, place the dresser in a well ventilated area and first removing all the hardware. This particular dresser not only had standard pulls, but also these faux escutcheon plates (aka key hole covers). These were just attached with tiny nails and easily removed by sliding a thin putty knife under the edges and prying off.

2. Scuff sand
Once you have a clean slate it’s time for sanding. Using the 220 grit sand paper, rough up the surface of the dresser. The goal is not to sand down to raw wood, but to dull up the existing finish. This will help the primer and paint adhere better.

Enjoy 10% off SurfPrep products with code: OAKANDGRAIN10

3. Clean thoroughly

Then, wipe down the dresser using Krud Kutter (or other degreasing agent) to remove any dust or debris. This is the part where I also wipe down the inside of the dresser pocket drawers, and the interior drawers themselves. You’ll be disgustingly surprised how much dirt comes off even the furniture that appears to be clean.
During the cleaning step you’ll really get acquainted with your furniture and learn all of its flaws. (Kinda like when you first move in with a partner… I mean you still love them, but you now have a full understanding.) Take note of these spots in need for repair as you move along in your cleaning process because next …
4. Time for repairs
Next, is time for repairs. If you’re lucky and have done a good job of selecting a high quality dresser in great condition this step should be easy. Unfortunately, I always seem to find little hidden repairs that can be big time suckers in this step.
May the repair gods be in your favor like they were for me on this particular piece of furniture. Aside from some little dings and scratches (which are inevitable in furniture refinishing) this only had a loose drawer slide.
To begin repairing the drawer slide, I first removed it by unscrewing a screw attaching it from the back of the base. I then applied some wood glue to the points of contact directed onto the slide. With the glue still wet, I reattached the slide to the drawer pocket using a screw in the front and one in the back.


I typically don’t get too crazy with repairing scratches or seems on this step. I focus on the larger repairs and you’ll see why in a few steps.
5. Prep your space and dresser for spraying
After repairs are complete, it’s time to prep for spraying. For this project I’ll be using my sprayer as opposed to brushing. Don’t have a sprayer? No problem! Check out my Painting Furniture with No Brush Strokes post.
To prep my space for spraying, I simply lay down a canvas tarp on my garage floor and tack up another tape on my garage wall adjacent to the garage door with a few nails. I don’t create a full on spray booth, but this method has been working great for me for years! I get plenty of ventilation by opening up the garage door. as long as it’s not a super windy day, all goes smoothly.
As for the dresser itself… I start by placing a piece of tape over each hardware hole to prevent paint from getting into the drawer interiors.

I prefer to spray with the drawers in. You could certainly take them out and wrap each one like the little present it is. However, I work out of a single car garage so space is of the essence.
Instead, I wrap just the top and sides of the drawers leaving the drawer slides exposed. I can then replace them back in their drawer pockets, not pushing them fully in so I can get the side edges. (Painting with them in the pockets is even easier if you’re working with flush set drawers.)

6. Clean again & prime in white
After you’re all taped off and wrapped up, it’s time to prime! But first… one last wipe down. Before laying down my primer usingmy sprayer I give the entire dresser a wipe down with 50/50 denatures alcohol and water. this will ensure you have a dust free, squeaky clean surface before applying your first layer where adhesion is ESSENTIAL!
I love the denatured alcohol approach because it dries lickity split and you’ll be off to the priming races.
Using my HomeRight Super Finish max sprayer, I filled the canister with filtered and watered down Kilz Restoration primer. I really like this primer because it performs like a shellac but is water based making clean up a breeze. Warning, it is a little fishy smelling.
I water the primer down by about 10%. So for every cup of primer I use, I add in about 1.5-2 tablespoons of purified water.

Before applying the primer I did a few test runs on my tarp to make sure I liked the width of my spray pattern and to ensure it was spraying smoothly. If I ever feel like my sprayer is sputtering the paint I add 1/2 table of water at a time until it’s nice a smooth, but no too much that it’s drippy. (Drip marks are a pain!).
Next moving to the dresser, I moved along in horizontal sweeping, steady motions overlapping each pass by about 50% for even coverage. (One pet peeve of mine is seeing people apply paint with a sprayer all willy-nilly with no consistent motion. It reminds me of when the He-Man Women Hater’s Clubhouse catches on fire in Little Rascals and Spanky rides the hose blasting water.)
You’re welcome for that nostalgic movie scene…

7. Repair & grain fill
After your primer is dry, it’s time to inspect for necessary repairs again. See how the white primer highlights imperfections? What a great example of why we should be charging more for white furniture. Can I get an Amen?!
Next, using my favorite ace wood filler and a putty knife I filled in the littlest cracks or dings left in the wood after sanding. For the larger seems, particularly where the top of the dresser meets the body, I used caulk to eliminate any gaps for a beautiful, seamless surface.


8. Sand again
You’ll notice a trend in my furniture refinish steps…. a lot of them are sanding or sand again. There is no short cut, however, to smooth finishes!
After the wood filler and caulk are dry I went over it with another round of sanding using a 220 grit until the primer and filled areas were smooth.
9. Prime with black primer
Once you have a surface as smooth as baby’s booty, you can now move onto the next step, priming again. Because I’m going with a dark paint color for this green painted dresser, I followed the white primer with black primer.
But why, Jess? I love how the white primer highlights imperfections and also is a good test for bleed through before covering the surface with black primer which will hide all those flaws I’d before to fill. Especially with glossier paint finished, all those dings, cracks and seams will come back to haunt you if you don’t take care of them before painting.
Before applying, I do another wipe down with the 50/50 water/denatured alcohol mix for a clean surface between coats. Spraying the 10% watered down black primer, I follow the same steady, sweeping motion rule of spraying.

10. Sand and clean… again!
You’re probably getting the hang of this by now. After the black primer was dry, I went over it with another round of 220 grit sand paper and a 50/50 denatured wipe down before moving onto paint.
11. Paint that dresser green
Using the exact same methods as the primer steps, I sprayed the dresser with this beautiful earthy green color.
This green painted dresser only required only 2 coats of paint – probably because I primed with a dark primer which really helps with coverage and saves you money because less paint is required for the project.
Between coats of paint I did a gentle sand with a 320 grit paper and on the final coat I’ll went up to as high as a 400 with these very fine Rad pads by SurfPrep.


12. Topcoat
Next, it’s time to protect your beautifully painted green dresser surface. Varathane or Behr Water-based topcoat in Satin are my go-to products.
When using a sprayer to apply topcoat I don’t water it down. It’s the ideal viscosity for spraying.
Again, you’ll want a quick sand coat with the 400 grit paper, a denatures alcohol wipe down before applying the polyurethane.
Repeat these steps between coats and apply 3 generous coats for maximal durability.
13. Add hardware
To complete your masterpiece, it’s time for what I call the jewelry of furniture refinishing… the hardware! It’s crazy how different a piece can look by just selecting different hardware. Once the paint was dry, it was time to attach the pulls. For this painted green dresser I went with an apothecary pull from Hickory Hardware. I love how they compliment the earthy green tone of the paint.

Hardware from Hickory Hardware. Enjoy 10% off with code: OAG10
To add a little more apothecary pizzaz I purchased these labels off of amazon and attached them in place of the original key hole covers I removed in the first step.


And there you have it! With a coat of paint, your outdated dresser is now a fresh and unique piece of furniture that you can be proud of.
This is just one of many ways to give old furniture a new life. You can be creative and mix it up by changing hardware or add other elements to bring more personality to it. Have fun and enjoy your newly revamped dresser!


I took this project just one step further….
I went onto a build a custom base on this dresser to really modernize it. I’ll write a future blog post on this process laying out every detail. But in the meantime, check out DIY Wife’s tutorial over on Youtube. I only modified her methods slightly to build a beautiful, wooden custom base for this dresser. Stay tuned for the full wooden base tutorial! Thanks for reading!


Girl Behind the Blog

I’m Jess, the creator of Oak & Grain. A mid-west girl at heart who now resides in Raleigh, NC. I love finding old things and giving them new purpose by way of refinishing or incorporating unexpected, overlooked thrift store finds in the modern home. I work full-time in medicine and I love dipping into my creative side and in the process, keeping my sanity. Follow me on Instagram and YouTube to see more behind the scenes action.
3 responses to “Green Painted Dresser Makeover That Will Turn Heads”
The ohoto on Yr Instagram shows a different base ? Did you change the base ? Did I miss that in your blog ?
Thanks for the comment, Aileen! You are totally right, I posted the wrong after photo on my IG. Consider the dresser in this blog post the After 1.0 and the base addition the after 2.0. I have updated the blog to reflect that discrepancy, glad you pointed that out! I’ll eventually share the tutorial on how I exchanged and built the base. But in the meantime, DIY Wife has a fantastic Youtube video. I only modified her approach slightly. https://www.youtube.com/watch?v=fFTS0aT_978
[…] this only after the body of the dresser was painted and dried. Check out the separate post on this Green Painted Dresser. In conclusion, whether you’re painting overlay vs inset drawers, both can be refinished with […]