
If you’re a fan of DIY projects and love transforming old pieces of furniture into something new and stylish, then a vintage black painted vanity makeover could be your next favorite project! Vintage vanities, also known as makeup dressing tables or vanity tables can add a touch of elegance and nostalgia to any room. With a little bit of creativity and some basic tools, you can give an antique vanity a fresh and modern update with a rich black paint finish that will make it the focal point of your space.
A client of mine brought me this vintage vanity. It was her grandmothers that had been sitting in storage, unused for many many years. While it was in overall good condition, it was way overdue for an update! There is something that gives me all the warm and fuzzies when refinishing family heirlooms like this vanity table.

If you visit your local thrift store you can usually find a vintage vanity or two. Just make sure it has good bones like dovetail drawers and is solid wood construction. It may need some TLC but a piece that’s sturdy and real wood is always a good contender for paint. Well… almost always.

If you are more of a video step-by-step tutorials kind of person you’ll have to check out my long format YouTube video of this furniture makeover. In this blog post I’ll just be sharing a summary of products I used in this DIY vintage vanity makeover and my design choices for this antique vanity flip.
CLEAN
For starters I used my shop vac to vacuum out the drawer pockets and underside of the vanity. This was a particular stinky piece so I sprinkled some baking soda into the drawers so it could start absorbing smells throughout my project (for more tips on eliminating odors from old furniture read this). I then used my favorite product, krud kutter and this sweet little drill attachment brush to scrub down the entire piece.


REPAIRS & PURCHASING REPLACEMENT PARTS
Next came repairs. For missing drawer front details I used this Amazing Mold putty to create new molds using KwikWood which I later color matched to the natural wood.


Oak and Grain Refinishing is a reader-supported blog. At no extra cost to you, I may receive commission if you click and buy through links on this site. Please review Terms & Conditions.
The drawer also required repairs, as you can see from the photo below several of the vanity drawers set back too far. I’m not sure what causes this, but it’s a common problems for many aged furniture pieces. If you prefer video footage of this repair check out this short clip reel.

Lastly – I needed to find a wood appliqué to replace the wooden detail for the top of the vanity mirror frame. I looked into having this piece 3D printed for a perfect vintage replica, but that was going to cost about $400. I now have a 3D printing contact, but certainly wasn’t worth the money for this particular project piece. Instead, I purchase this wood appliqué off Amazon. We’ll talk in later steps how I color matched these items and attached them to the vanity drawers and vanity mirror frame.


SAND
Once all my missing pieces where either repaired or purchase it was time to move onto sanding. Using my SurfPrep sander, I gave the entire vanity a good sand using 220 grit sandpaper. The goal when planning to paint furniture isn’t to fully remove the old finish, but to scuff sand it enough to dull the original finish so paint will stick. I planned to keep the top front drawer natural so I did not sand this part.

Enjoy 10% off SurfPrep products with code: OAKANDGRAIN10

TAPE OFF DETAILS YOU WANT TO KEEP NATURAL
Before moving on to priming or painting your furniture piece take a moment to consider if you want your final furniture design to incorporate natural wood elements. If so, tape off these details using painters tape.

PRIME
Once the piece was sanded leaving a smooth finish and details were taped off I was ready to prime. I prefer priming in white first, no matter what color I’m painting the piece. This is because white primer really highlights imperfections you may want to fill with wood filler or repair before painting. My favorite water based primer that performs like a shellac is Kilz Restoration. You get all the stain blocking benefits without the clean up hassle.
Even when choosing a darker color paint, the higher the sheen of your paint the more imperfections will show. Priming with white first is also a good way to ensure any potential bleed through is blocked and doesn’t seep into your final paint finish which is less noticeable with dark colors, but can still happen.

After the furniture piece has full coverage white primer I then moved onto Aqua Lock black primer. Since I’ll be painting this a dark color, using a dark primer will really help with my paint coverage and allow me to use less of my rather expensive paint. If you were planning to paint with a light color, like white paint, you’d only prime white.
Keep in mind, the best way to get a super smooth finish is to sand between every single coat of primer and paint or topcoat. I start with 220 before the first coat and gradually move to up between each coat. For example I start with 220, then before moving onto paint I’ll move to 320 and before laying down my last coat of paint I’ll gently sand with a 600 grit paper.
PAINT VANITY, MIRROR FRAME & STOOL
The best paint, in my opinion is Wise Owl One Hour Enamel if you’re after. sleek, non-distressed finish. I can always get a perfect finish with this paint using my HomeRight Sprayer. You can certainly use a chalk paint or mineral paint, but I love this paint because it’s incredibly durable for cabinets and furniture. The best part is that it does not require a protective clear coat! For this DIY vintage vanity project I selected the paint color Jett Black and applied using my paint sprayer. As much as I wanted a stained top, the veneer had some odd patterns and didn’t sand down to a very even look. So I ended up painting the top. Before applying my second coat, I sanded lightly with a high grit sand paper (320-600).
REPLACE MIRROR
The vanity came to me without the vanity mirror which made painting the mirror frame so much simpler. If you can, I recommend removing mirrors and glass before painting whenever possible. Your finish around the permitter will be so much cleaner. If it’s impossible to remove, you can always use a Liquid Mask & Seal product, but still might get flaking around the perimeter.
I then took it to my local glass shop, Binswanger, where they replaced the glass securely. This shop has come in handy on many occasions for other furniture makeovers.

APPLY APPLIQUES & WOOD MOLDS
For the molds I created with Amazing Mold and KwikWood I used General Finished Gel Stain in the color Antique Walnut to give it a good base color. To create a faux wood look I then took a coordinating color of Varathane correction marker and make small little lines to replicate wood grain. To my surprise this actually worked really well!
I used the same gel stain for the wood appliqué before attaching it to the top of the mirror using wood glue and brad nails.


WOOD CONDITION FRONT TOP DRAWER
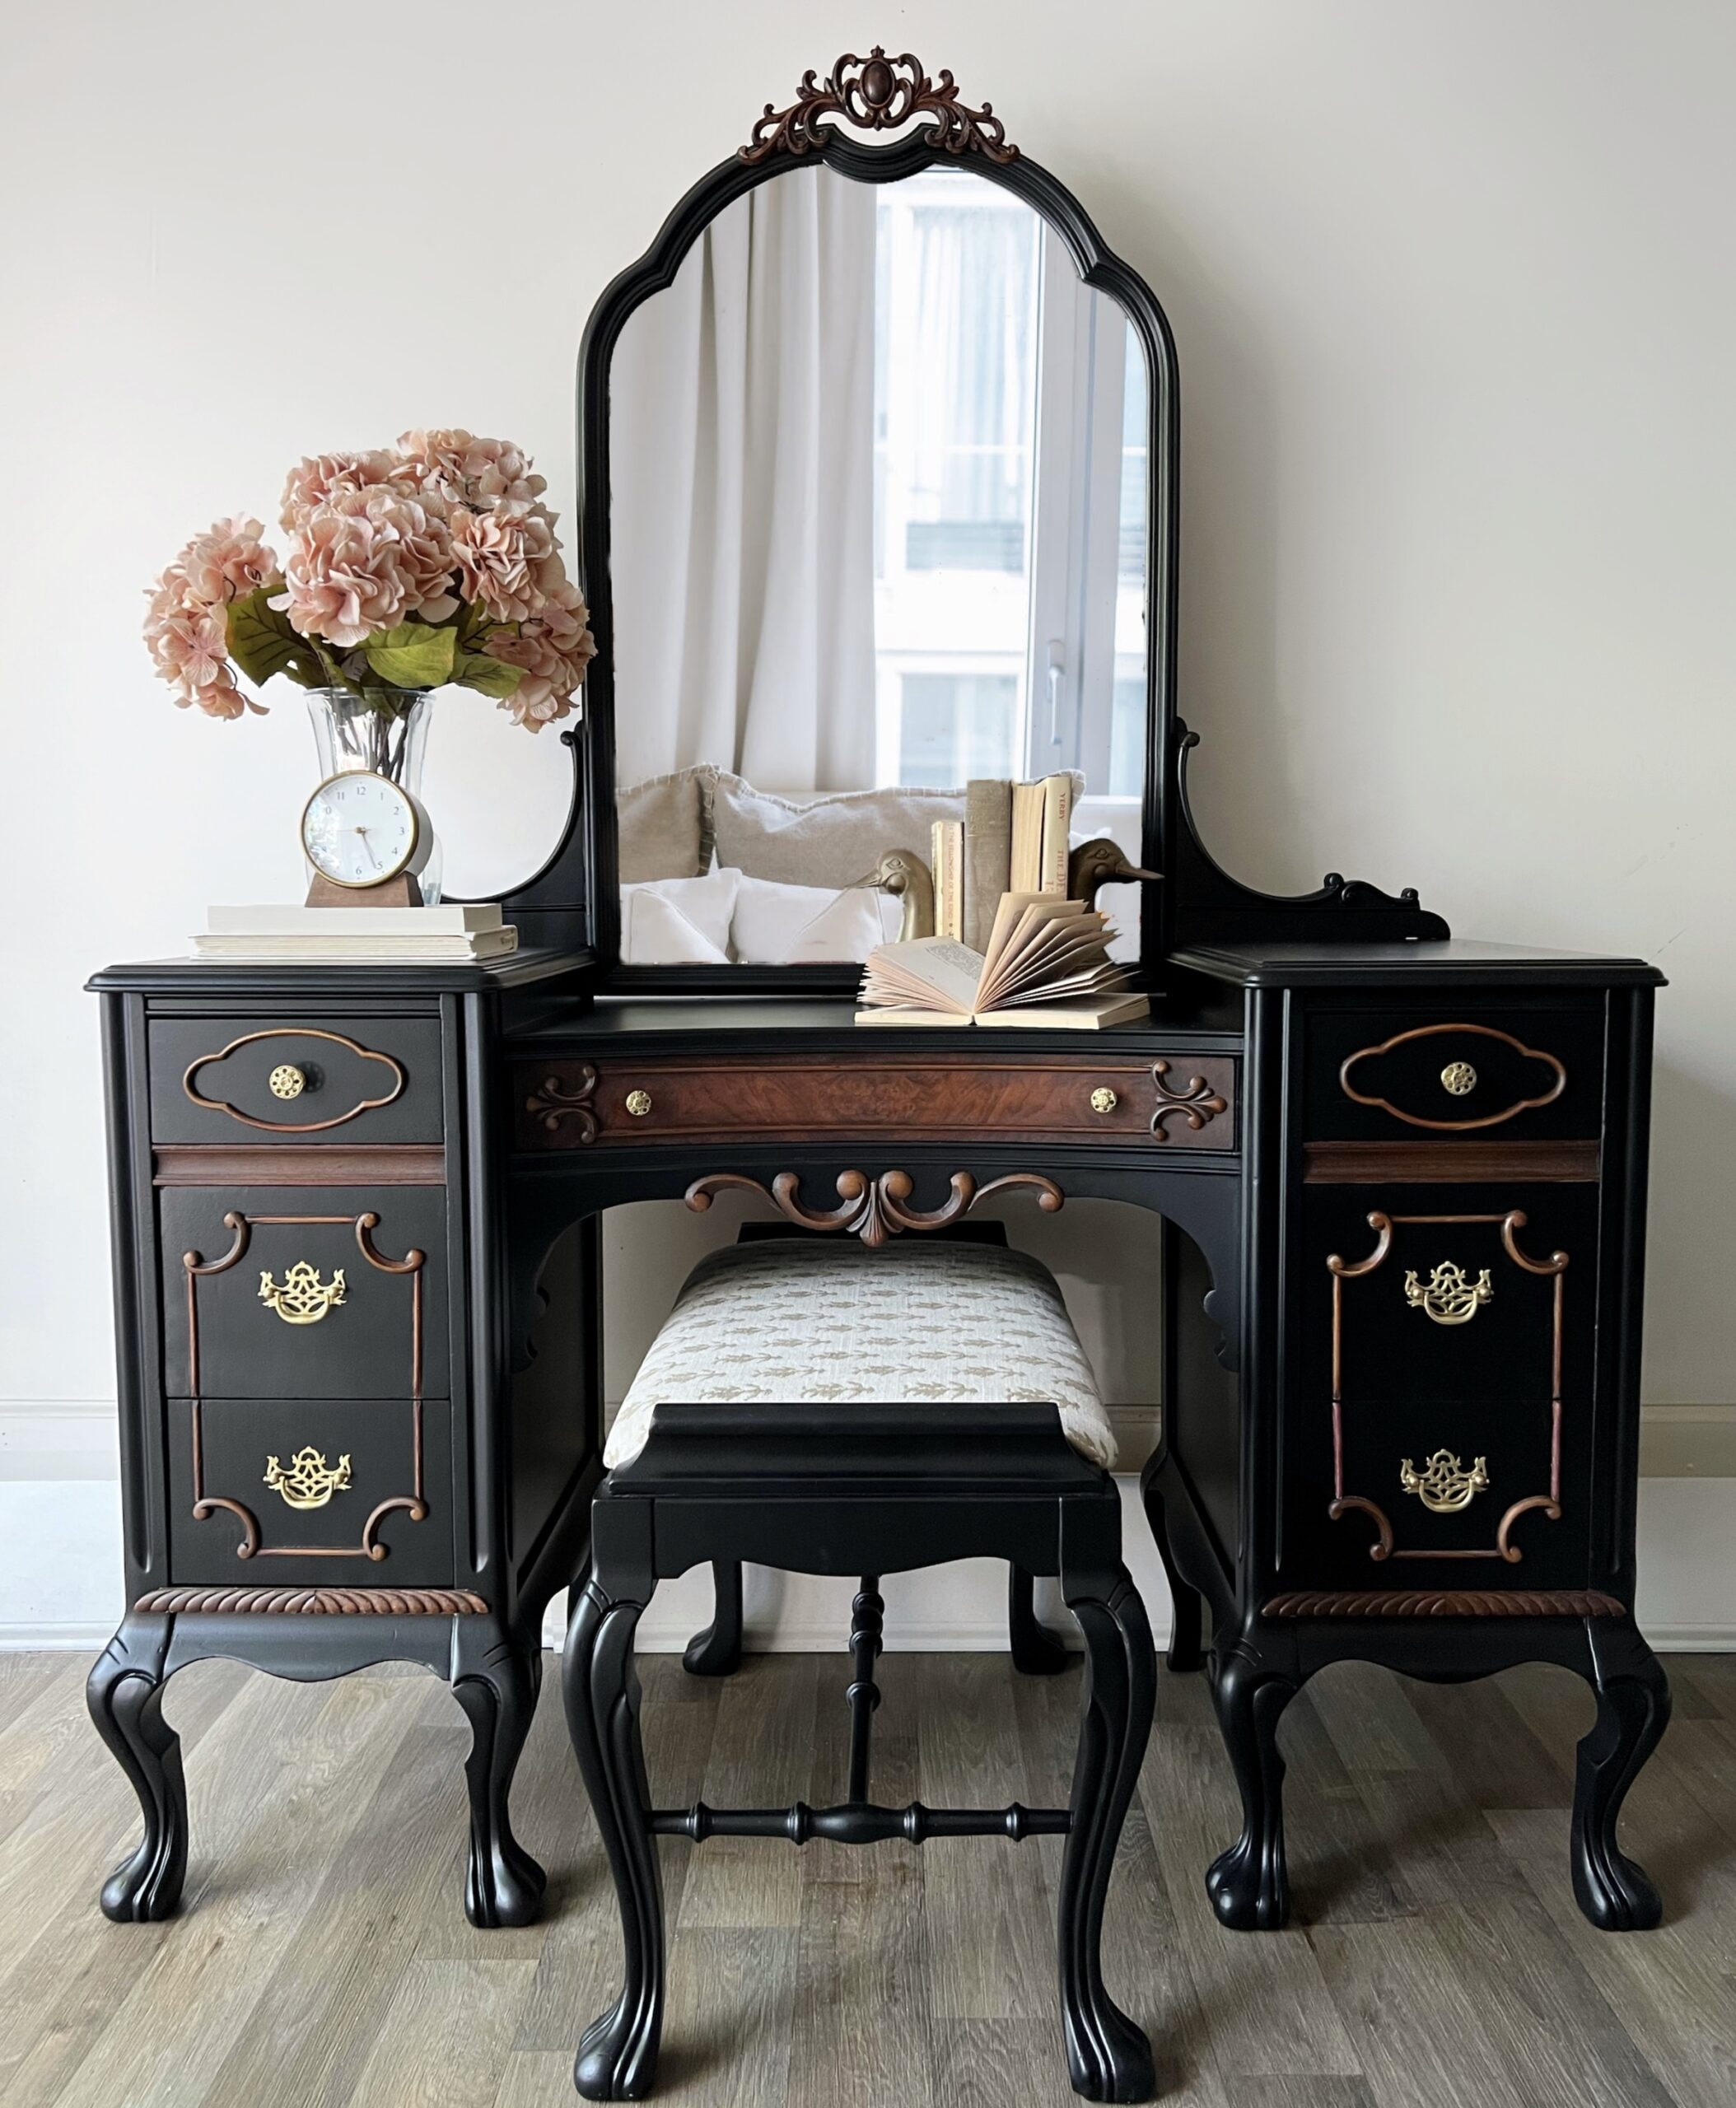
As you can see from the photos, I kept the central drawer natural to help tie in all the natural details on the drawer fronts with the natural wood appliqué over the top of the mirror. To refresh the original wood I used Restor-a-Finish. Check out my blog post on How to Refresh Wooden Furniture without Sanding for more tips and products like this.
POLISH AND REATTACH HARDWARE
Luckily this vanity had all of the original hardware so new hardware wasn’t needed. To polish them up to a shiny finish I boiled them in 50/50 water/vinegar for about 10 mins. After removing the hot hardware with tongs and allowing them to cool, I then followed by scrubbing with barkeepers friend and 0000 fine steel wool. They turned out beautifully! I love using original hardware whoever possible. If you ever are missing just one piece it’s always worth looking on Etsy for a vintage replacement. Reverse google image search can be your friend in these hunts.
REUPHOLSTER VANITY STOOL
Once the body of the vanity was completely painted and the polished hardware was reattached, It was time to turn my attention to the sad and worn looking vanity stool. I removed the old fabric and worn out cushion and reupholstered the vanity stool. I ended up reinforcing the seat with a sheet of plywood. This new, fresh fabric was purchased from a local end-of-roll shop at the Raleigh Farmer’s Market called Courtland Fabrics at a fantastic price. (I even had enough to sew a new pillow for the guest bedroom).
Using batting, foam and an upholstery staple gun I was able to create a new, fluffy cushion.

Tell me what you think of her new look! I personally love the classic color combo of natural wood and black. It’s hands down one of my favorite projects.
A few purists on YouTube even approved, acknowledging that painting the piece only accentuated it’s charm. And I have to agree 🙂 What do you think of the finished product?

In conclusion, transforming a vintage vanity with a black paint makeover can be a fun and rewarding DIY project. With some basic prep work, the right paint, and attention to detail, you can turn an old piece of furniture into a stylish and functional makeup dressing table that adds charm and character to any room. Don’t be afraid to get creative or keep natural wood elements to make your vanity truly unique.
I hope this antique vanity makeover step-by-step tutorial has inspired you to take on your own furniture makeover project. It’s a fantastic way to breathe new life into an old piece of furniture and create a statement piece for your home. So go ahead, pick up that thrift store find, gather your supplies, and let your creativity shine as you transform a vintage vanity into a stunning piece of furniture. Happy DIY-ing!

Girl Behind the Blog

I’m Jess, the creator of Oak & Grain. A mid-west girl at heart who now resides in Raleigh, NC. I love finding old things and giving them new purpose by way of refinishing or incorporating unexpected, overlooked thrift store finds in the modern home. I work full-time in medicine and I love dipping into my creative side and in the process, keeping my sanity. Follow me on Instagram and YouTube to see more behind the scenes action.
2 responses to “DIY Black Vintage Vanity Makeover with Mirror and Stool”
Absolutely beautiful Jess! I am a detail fanatic, but this turned out SO WELL it is definitely intimidating!
Thanks so much for the kind comment, Ann! Yes, this was definitely an intimidating project. But like my mom always said… “Take it like an elephant, one bite at a time!”.