
If your spice storage is a cluttered mess, this DIY spice rack with gallery rail is the perfect solution to keep everything organized and beautifully displayed. We used to have a disorganized cabinet filled with mismatched spice jars—it was impossible to find anything or even see what we had available. Not to mention it took up essential cabinet space in our small kitchen.
Now, with this custom spice rack, everything is easy to see and easy to access. With a gallery rail detail and custom sizing to fit both small and large jars, this project had added so much charming style to our kitchen and is so ridiculously functional. Whether you’re looking to free up cabinet space or simply want a prettier way to store your spices, this DIY spice rack with gallery rail is a great way to bring order and charm to your space.
Spice Up Your Kitchen & Customize a Spice Rack with a Brass Gallery Rail
diy project / diy spice shelves with brass gallery rail / wooden dowels / unique spice rack / how to build a custom spice rack / cutest spice containers for spice rack / extra storage for spices / spice storage solutions / custom diy spice rack
Materials Needed to Build Your DIY Spice Rack:
- (2) 1×4 boards cut to 30” (side pieces) I used primed pine, but any type of wood will do
- (1) 1×4 board cut to 16 (bottom piece)
- (3) 1×3 boards cut to 14 1/2” (shelves)
- Miter saw (or friend with miter saw 😉
- (4) Gallery rail bars cut to 15 1/2″ each
- Bolt cutters (not required if using wood dowel rod)
- Tape measure
- Speed square
- Wood glue
- Wood filler (I used bondo glazing putty & Kwikwood)
- Brad nailer and brad nails
- (2) 24″ clamps. (If you have corner clamps these could come in handy)
- Jigsaw
- Drill and drill bits
- Rubber mallet
- Sandpaper 80 & 220 (sander optional)
- Tack cloths
- Paint & paint brush
Oak and Grain Refinishing is a reader-supported blog. At no extra cost to you, I may receive commission if you click and buy through links on this site. Please review Terms & Conditions.

How to Build Spice Rack: Step by Step
1. Cut All Pieces for Spice Organizer
Start by cutting all your boards to size using a miter saw (or friend’s ;). For this project you’ll only need 2 different sized boards – 1×3 and 1×4. I purchased mine at Home Depot in the 8ft size (you’ll have some left over). Keep in mind, if you have certain spice containers you wish to use, you can also customize the length, height and shelf depth. You can make it custom to you! But here are the measurements I used:
- 1×4 cut to 30 inches (2 pieces)
- 1×4 cut to 16 inches
- 1×3 cut to 14 1/2 inches (3 pieces)

2. Fancy Up the Side Pieces with Curved Jigsaw Cuts
Next, take your 1×4 boards cut to 30 inches. These will operate as your vertical side pieces of the spice rack. To fancy up the edges and give it a more refined look I used a jigsaw to create curved cuts.
I started by ripping 1 inch off the top 21 inches of the board. As I approached the 21″ mark I then curved my cut into a gradual taper so the bottom 1/4 of the board remained the full 3.5″ wide. This tapered, curved cut will allow me to keep the bottom shelf deeper to store some larger jars.


For the top of the side boards, I used a round stencil (aka a roll of tape) to trace a rounded edge that I also cut using my jigsaw.


Once you have one side’s curved edges cut, you can lay it on the other and trace the pattern. Then repeat the jigsaw cutting for the 2nd side board.


I realize the cutting descriptions of the side pieces may be a bit confusing. Above, you can get a good visual of the shape. Basically you’ll end up with a 1×3 on the top 3/4s of the board with a rounded top edge and a 1×4 board for the bottom 1/4th with a smooth, curved transition cut.
Note for beginners: Actual dimensions of wood boards are smaller than what you see on the label! For example, a “1×4” board sounds like it should be 1 inch by 4 inches, but in reality, it’s only 3/4 inch thick and 3 1/2 inches wide. I know.. it makes no sense!

Don’t worry if your jigsaw cuts aren’t perfectly smooth—mine certainly weren’t, and my two side pieces weren’t exactly identical. To smooth out imperfections and make them more uniform, I sanded the edges together using 80-grit sandpaper.
Wooden spice rack DIY / DIY kitchen storage ideas / Spice rack woodworking project / Functional spice rack design / Spice jar storage ideas / Gallery rail for spice rack / How to make a spice rack with different size shelves / DIY kitchen upgrades / Small kitchen spice rack ideas / Stylish spice rack for kitchen
2. Assemble the Frame for Wall Mounted Spice Storage
Once the side pieces were cut, I attached the 16” bottom piece using wood glue and a brad nailer. Next, I positioned the three 14.5” shelves, spacing them 6.25″ apart (the perfect height for easy removal and replacement of my spice jars). Again, I secured them with wood glue and the brad nailer for durability.

You’ll notice there is no back piece. This design is meant to be a wall mounted spice shelf, so the wall will act as the backing for your spice jars.
Next, fill nail holes – using a small amount of wood filler or bondo glazing putty, fill the small nail holes created by your brad nails. Be sure your material is dry before moving onto the next step.

3. Dry Fit the Spice Rack Gallery Rails
To give the spice rack a refined touch, I added a gallery rail to the front of the shelves. To ensure precise placement, I created a small jig using scrap wood. I marked ½ inch from the front edge and 1½ inch up from the top of the first three shelves.
For the bottom shelf, I marked ½ inch from the front edge, but adjusted the height to 2 inches up from the top of the lowest shelf. This will allow space for larger glass jars.

Next, you’ll want to note which side will be less exposed when hung. Starting with this side, I drilled clearance pilot holes (meaning they go all the way through the wood) to fit the rail bar. I started with a small drill bit working my way up a large drill bit (my brass rail thickness required a 1/4″ bit).

On the more exposed edge, however, I only drilled a partial-depth hole (also known as a blind hole) about 1/2′ into the inner edge. This will receive the brass rails as a shallow pre-drilled hole, but leave the exposed side nice and smooth. Plus, you’ll only have to fill one side board later ;).

Next, I dry fitted my brass gallery rails. Using a rubber mallet, I gently tapped the rail bar through one hole until it reached the other side and ensured that it fit snugly into the partial-depth pilot holes.

Before painting, I removed the brass gallery rails – the initial fitting was just to ensure your holes were appropriately spaced and to make sure your brass rod was the right length. I also wanted the holes drilled before sanding and painting, but we will add the brass bar back after the painting is finished.

The gallery rail I’ve linked here is not cheap! For this project you’ll need 68in. of railing, meaning you’ll need to purchase the 72in product if following this tutorial to the tee. The only reason I’m using this material is because we had a large amount left over from our Open Kitchen’s with Gallery Rail project. I were only using it for this spice rack project I likely would not purchase something so expensive. Instead, I’d use 1/4 wooden dowel rods and spray paint is gold for a similar, more budget friendly look.
4. Sand the boards smooth to prep for paint
After assembling the wooden frame and dry fitted the brass rails, I thoroughly sanded all edges and surfaces to ensure a smooth finish. Once sanded, I cleared the rack with a tack cloth to remove any unwanted debris that may compromise my paint adherence.

Enjoy 10% off SurfPrep products with code: OAKANDGRAIN10

5. Paint Spice Storage Shelves
Since I purchase pre-prime boards, they didn’t require any coats of primer. However, if you are using raw wood boards you’ll want to add a primer coat if painting. Going in with my paint brush, I applied two coats of paint in the color Behr’s Sculptor Clay in a semi-gloss paint finish. Allow the paint or stain to dry completely before proceeding to the next step.

6. Secure the brass railing to the shelves
Once your paint is dry, next you’ll go back to add the gallery rails into the pre-drilled holes. I preferred to add this back in after paint because painting around the railing would have been quite fussy. Using the same method during dry fitting, tap the railing into the fully drilled holes until it almost reaches the other vertical side. Once you’re close, you’ll want to guide the brass rail into the 1/2inch pre-drilled pilot hole.


For extra durability you can also had a small bead of wood glue in the receiving hole. (I didn’t because the fit was so snug I didn’t feel it was necessary.) You’ll see after tapping your gallery rail back in how this small brass feature really adds an elegant and functional detail, preventing jars from tipping over while maintaining a beautiful display.
7. Filling holes and touch up
At this point your paint is dry and you’ve added back your brass gallery rail into the snug pilot holes you created.
Next, you’ll need to go back to fill the pilot holes that were drilled. I used Kwikwood for these areas (it’s better at filling deeper holes that regular wood filler).


Once dry (~60 mins), I gave it a gentle sand with 220 sand paper and touched up the paint on that side.


8. Mount spice rack to your desired area
With assembly complete, I mounted the rack securely to the side of our refrigerator cabinet panel, but you can certainly mount to a pantry door, kitchen wall or wherever makes sense for your space.
Mounting to the side cabinet panel of the refrigerator proved itself to be a small challenge. With the refrigerator pulled out of the cabinetry, I created a stud using 1×3 boards that I ran from the back wall to the front face frame. I used a pocket jig to drill into the back of the cabinet and into the face frame.

Next, I created pocket holes on the inner and outer less exposed vertical pieces of the spice rack. Using pocket holes screws, I drilled through the pocket holes of the spice rack into the stud I created within my fridge panel. I’m working on a blog post just about that process. Stay tuned…


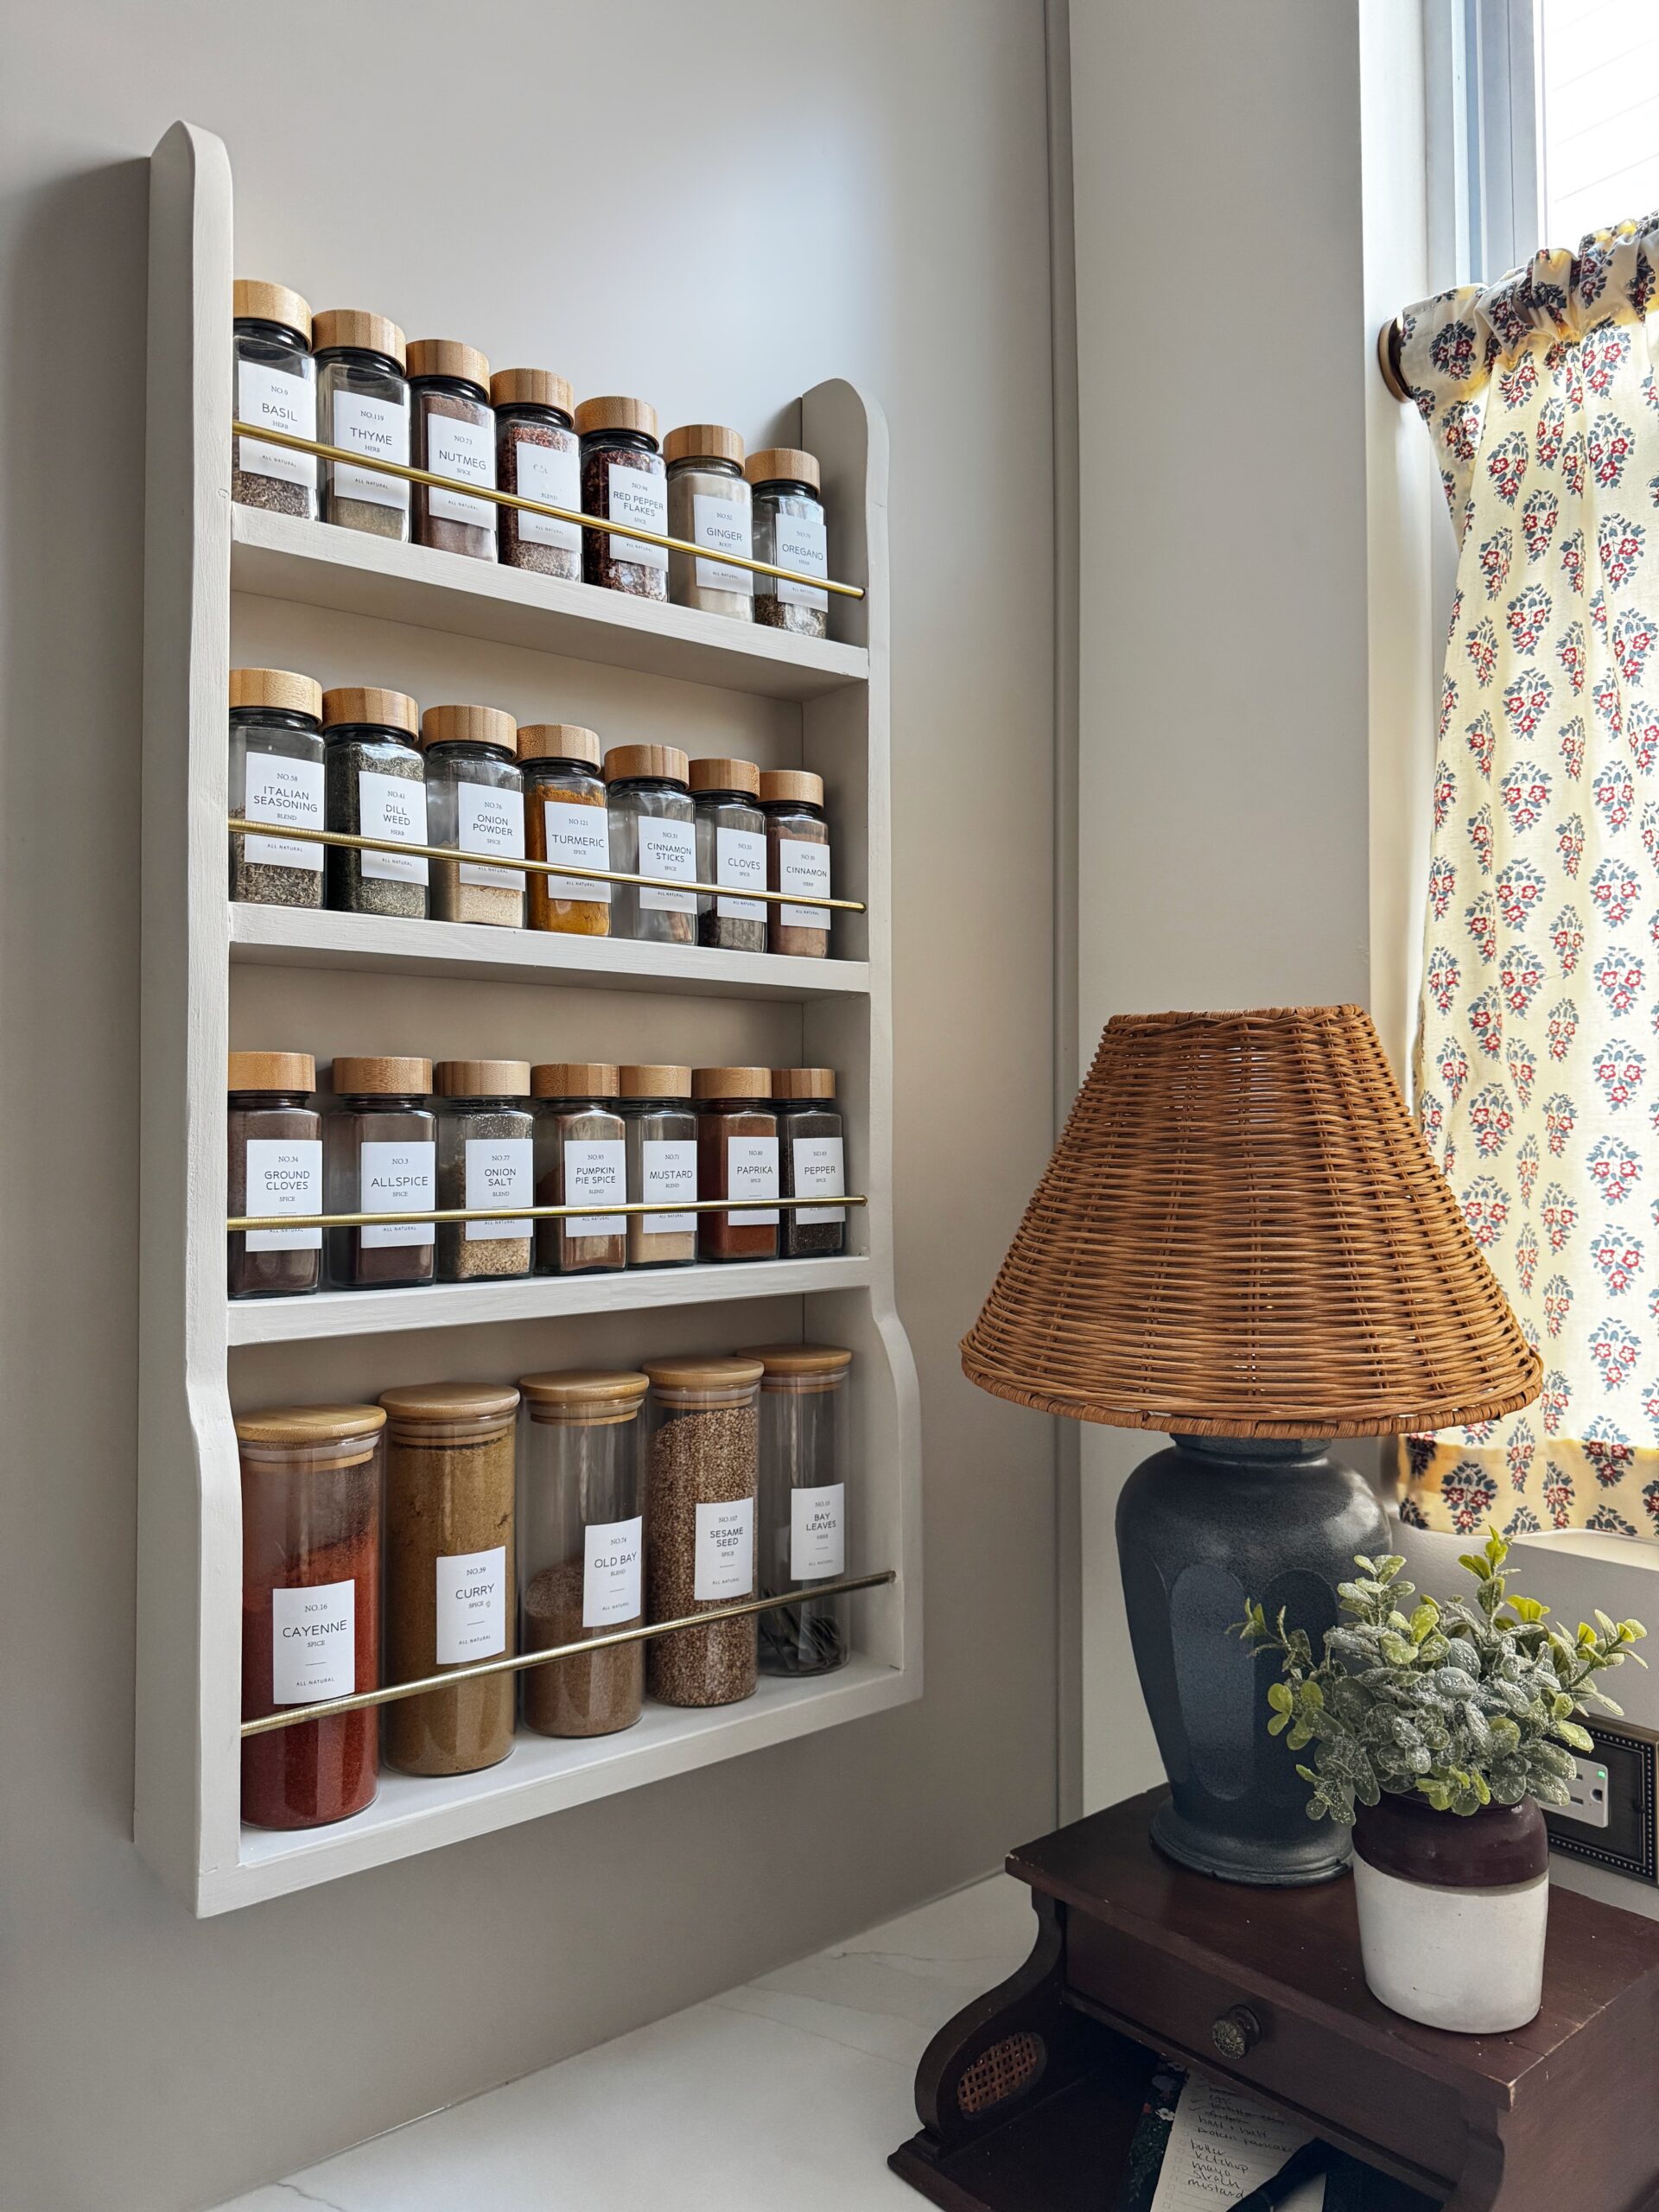
9. Adding Cute Spice Jars
Then, I filled it with my favorite spice jars that come with sleek white spice labels, as well a larger glass jars with bamboo lids for the bottom shelf for spices that we buy in bulk.


This DIY spice rack with gallery rails is the perfect kitchen upgrade!
This DIY spice rack with a gallery rail is the perfect solution for maximizing storage space while adding a stylish touch to the kitchen wall or fridge side panel, in my case. It’s the perfect size for our wall opening beside the fridge, and I love how the deeper bottom shelf holds larger spice containers, while the glass jars stay neatly in place with the gallery rail.

This is such an easy way to keep your favorite spices within reach, whether mounted on a pantry door or tucked into a small nook. Plus, the brass gallery rail coordinates beautifully with our open kitchen shelves, adding just the right amount of charm!
Would you try this DIY? Let me know how you’d customize your spice shelves to fit your space!
You May Also Like…

Girl Behind the Blog

I’m Jess, the creator of Oak & Grain. A mid-west girl at heart who now resides in Raleigh, NC. I love finding old things and giving them new purpose by way of refinishing or incorporating unexpected, overlooked thrift store finds in the modern home. I work full-time in medicine and I love dipping into my creative side and in the process, keeping my sanity. Follow me on Instagram and YouTube to see more behind the scenes action.
Keywords: How to build a spice rack / Beginner friendly spice rack build / Spice rack tutorial / DIY spice rack with brass railing / Wall-mounted spice rack/ Spice rack with gallery rail / Custom spice rack DIY / Kitchen spice organization / DIY spice storage solution / Easy DIY spice rack